Combine Marketing List Automations
Have you ever wanted to combine a set of selected Marketing Lists into an already existing Marketing List or a brand new Marketing List all together? If so, look no further!
Goldilocks makes it easy to combine any two or more selected Marketing Lists into any existing Marketing List or new list in just a few clicks with the Automation type: Combine Marketing Lists.
Let’s dive into leveraging this Automation.
How to Leverage Combine Marketing List Automations
There are two ways in which you can access Combine Marketing List Automations.
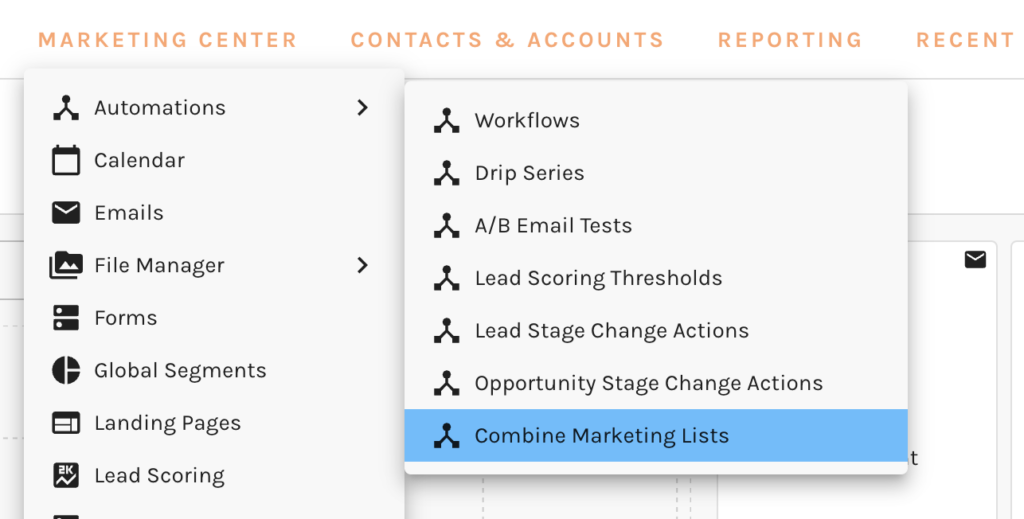
First, navigate to Marketing Center > Automations > Combine Marketing Lists.
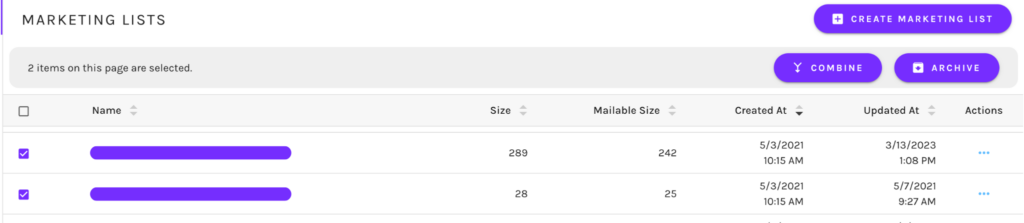
Second, within Marketing Lists, select at least two Marketing Lists to combine. After you select two or more Marketing Lists you’ll see “combine” populate next to “archive”. Select this option.
Upon selection of Combine Marketing Lists (or Combine from the Marketing List Dashboard), the Combine Marketing List Automaton page will display.
Here you can select any Marketing Lists of your choosing, or the Marketing Lists selected from the Dashboard will be present. Add as many lists as you would like, by simply searching.
Lets go over all the various items within the Automation setup page.
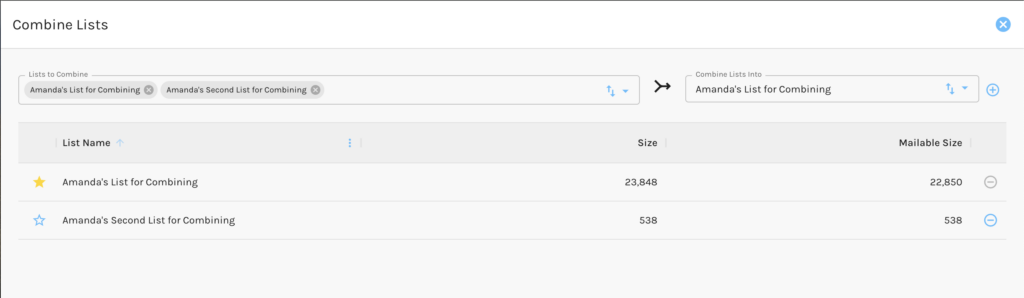
- Lists to Combine- Here you will see all selected Marketing Lists, in which you wish to combine. Type to enter more, select the x to remove.
- Combine Lists Into- Here is the list, in which you want to combine all the lists into one. You can easily use the drop down to select any Marketing List within your account, or create a new list on the fly via selecting the + icon next to the drop down.
- List Name- All selected Marketing Lists to combine will be present with data including:
- Size- This is the total size of each Marketing List
- Mailable Size – The total number of mailable contacts (those whom have a valid email address on file, are not bounced or have not unsubscribed).
- At the bottom of table, you will note “Final Combined List”. Here is where you will see, once all lists have been combined in one, the total number of Unique Members between all lists and the total number of Unique Mailable Members.

You will also notice a star next to each Marketing List. The yellow star indicates this is the target list to combine your Marketing List members to.
If at any time you would like to remove a list, select the “-” icon on the right hand side of the screen.
Once all Marketing Lists have been selected, and you have selected your target Marketing List in which you would like to combine, select “Combine Lists”.
There you have it! You now have easily, and quickly combined your Marketing Lists into one list.
If you have any questions on Combine Marketing List Automations, or would like a live walkthrough of this handy Automation, please reach out to our Customer Success Team at support@net-results.com.