What are the Enhanced Features in Goldilocks?
Goldilocks’ enhanced features are easy to use and give our users more power within the platform. We are excited to highlight some of these features within Goldilocks!
CRM Field Mappings
Within your SalesForce or Dynamics Field Mappings page, you have the ability to create a new Goldilocks Custom Field (Contact & Account) on the fly.
Via the mappings page, you will see a + icon next to each field on the mappings page. Select this to create a new custom field. If you are doing so from the Account Field Mappings, an Account Custom Field will be created. If you are doing so from the Contact or Lead Field Mappings page, a Contact Custom Field will be created.

Upon selection, a drawer will appear to create your field. Goldilocks knows the field type this field is within your CRM, making it super easy to map between the two. You will notice the field type is greyed out! If your field is a drop down, make sure to select which drop down to tie the field to.
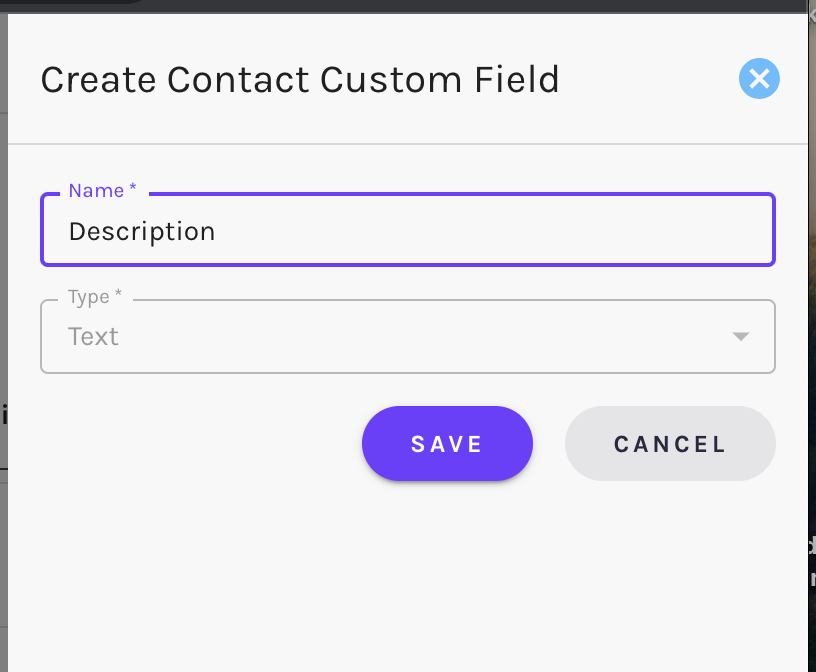
Once saved, your field will automatically be mapped with the new custom field you created! Make sure to select if you want to sync this field to Net-Results from your CRM, to your CRM from Net-Results, OR both!
Dark Mode
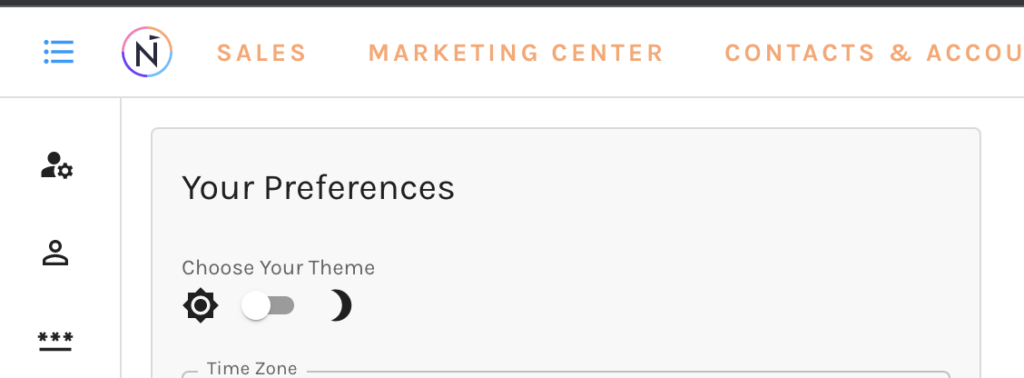
Are you a person who loves to set your devices and apps to Dark Mode? We are too! This is why we have made it so that you have the ability to do so within Goldilocks.
To change your preference from light mode to dark mode, simply hover over your user in the top right corner. A module will appear where you can select your theme. By default, it is set to “Light Mode”. To switch to “Dark Mode” select the moon and voila! Your theme is now set to Dark Mode.
Your theme preference will be saved so any logins from any devices will obtain this theme.
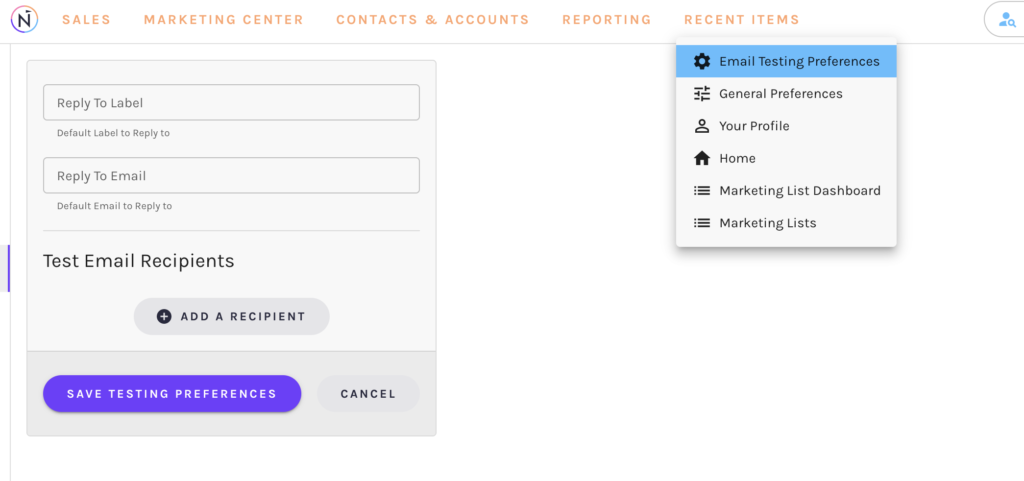
You can also change this setting by hovering over your user icon and selecting “Personal Settings”. Within Personal Settings, on the right-hand side, select “General Preferences”. Once selected, your preferences will appear and you can switch between light and dark modes with a click of a button.
Search Bar
Easily search for any contact in your account with an email address by using the Goldilocks “Search Bar”. In the right-hand corner of the app, you will find the “Search Bar”. This bar will display in all parts of the app.
You can click on it at any time to bring up the search dialogue. Input your contact’s email address and the contact will display. The dialogue box will retain any contacts in which you searched for your logged-in session.
To exit the search dialogue box, select the “X” or the ESC key.
We have also added keyboard shortcuts to the app that will allow you to quickly access the Search Bar. To use the keyboard shortcut for the Search Bar, on a Mac use command F and on a Windows, Computer use CRTL K.
Recent Items
The Recent Items menu allows you to view all recent items that have been used within your recent sessions of Goldilocks. This feature allows you to recall where you recently were within the platform and get back to a specific section of the platform.
To view your Recent Items, simply hover over “Recent Items” and a drop-down will appear with all your recent items!
Date Range Picker
Goldilocks comes with a date range picker that allows you to select any date range of your choosing. The date ranger picker allows for set date ranges (today, this week, this month, etc.) to select, or set an exact date.
To set a date range, in the top right corner select, “Set Date Range”.
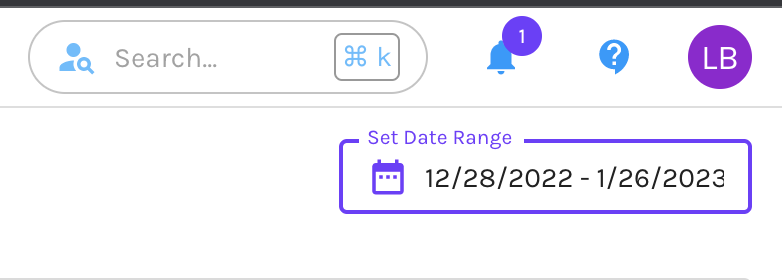
A pop-up module will appear with the Goldilocks date range picker. Choose a set date range or select a specific date with the picker. You can also manually add the dates!
Data Grids
Throughout Goldilocks, you will notice our new and improved Data Grids.
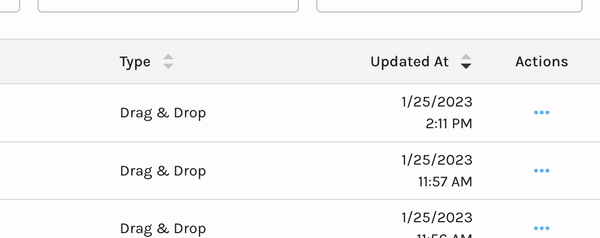
- One of the first things you will notice with our new data grids is that the header and footer of the grid stay in place while you scroll. This gives you the ability to see at all times the headings of the columns within the grid.
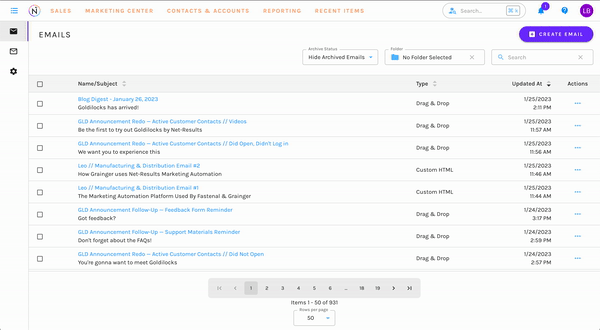
- Easily access our action icons within the data grid. These give you the ability to create an action directly from the data grid you are viewing.
- With the search option, you have the ability to easily search for any form, email, automation, or list within your Net-Results account.
Notifications
In the top right corner of Goldilocks, you will find your Notification Center. The number of unread notifications you have in your account will display. Selecting this icon will take you to the Notification Dashboard.
Within the Notification Dashboard, a notification for each completed report is available. This includes the name of the report and the date & time on which the report was completed.
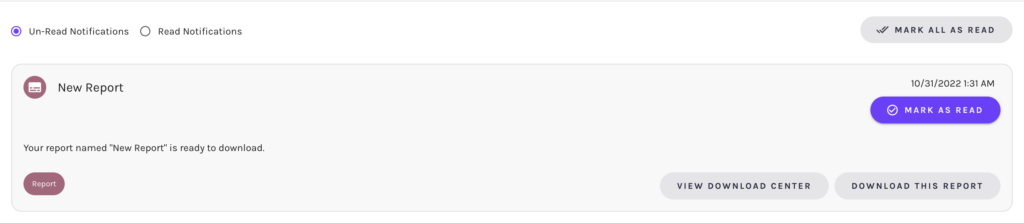
Each notification will allow you to:
- Mark As Read
- View the Download Center
- Download the Report
You can individually mark each notification as read, or in the top-right “Mark all as Read”
The notification center also allows you to view all “Read” notifications.
User Profile
You’ll notice in the top right corner of the platform, each user has an avatar. This is either an image or your user’s initials.
Images will appear for users who have a Gravatar set up. If you do not have a Gravatar, your user initials will display!
This avatar is also present on your contacts in your Net-Results account!
Sorting and Searching
Via drop-downs menus in your Goldilocks account, you have the ability to sort by names, dates, created date, modified date, and even list member count (when selecting from lists)!
We’ve added it to many forms across Goldilocks, allowing you to search for items much more efficiently and use them where you need to. These drop-downs “remember” your sort preference where possible to save you time!
Some of the places you’ll see this change reflected in:
- Email on Send Email (drip series)
- Simple Participants form (selecting list for drip series audience)
- SMS on Send SMS (drip series)
- Segment on Export Contacts
- Campaigns / Forms / Segments on the create Report page
- Campaign in Add to classic campaign action setup
- Lists in add to / remove from list action (both kinds of lists)
- Campaigns in add to / remove from actions
- Segment builder: for conditions relating to forms (& mapped forms)/campaigns/landing pages/lists
- Send It! Emails (lists)
- Items included in Marketing Campaigns
- Contact Details: Send One-Off Email (aka Conversation Email)
- Create/ use Tags for Drip Series or Send It! Emails
- Select Tags for a report
Have any feedback on Goldilocks features?
Here at Net-Results, we love to hear your feedback! If you have any feedback for the Net-Reuslts team on any enhanced feature, feel free to email the Customer Success Team at support@net-results.com or submit our Feedback Form.
Happy Automating!