What Are Contact Import Actions?
Setting custom fields or taking actions for your contacts has never been easier. With Contact Import Actions, you have the ability to take actions for your contacts, upon upload, based on conditions you have set or for all contacts. These actions include setting field values, adding to a list, automation qualification, and more.
How to Leverage Contact Import Actions
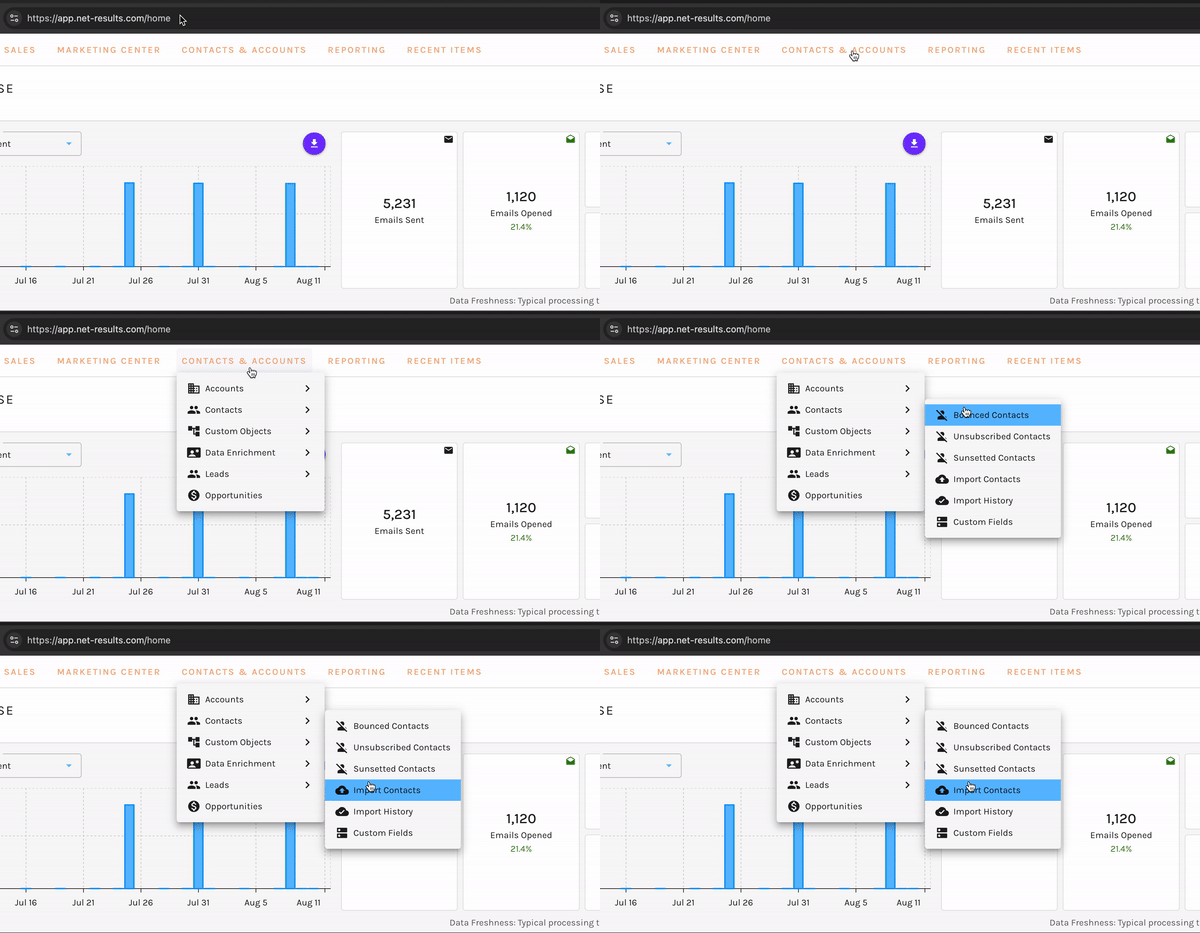
To leverage Contact Import Actions, navigate to Contacts & Accounts, Contacts, and then select Import Contacts.

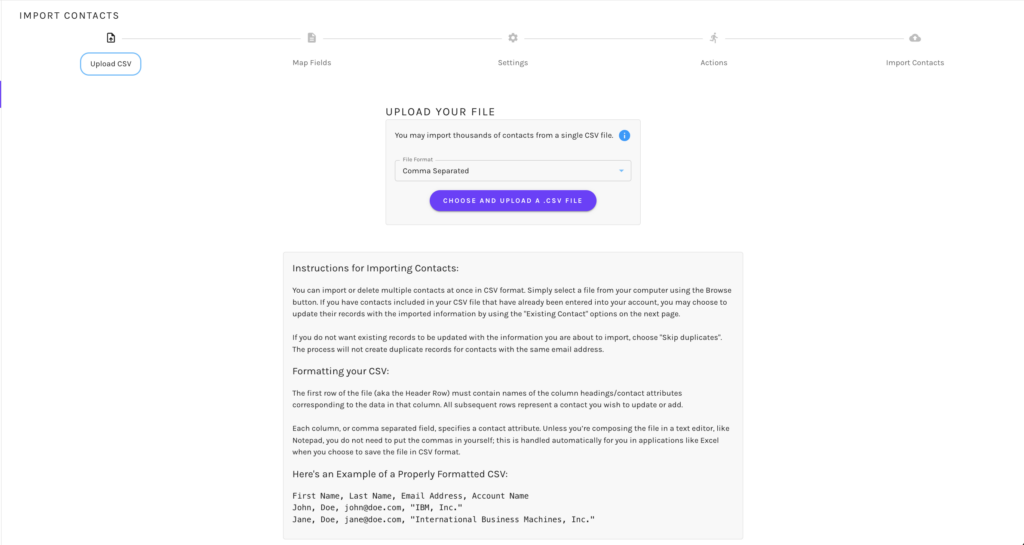
You will see a familiar option to upload your CSV file into the system. Select the option “Choose your CSV File and Upload”.

Once selected you will be taken to the field mappings page. Map all fields that are present on your CSV file that you would like to be written to your contacts, within your Net-Results account. Select save to be taken to the Settings tab.

Within the Settings tab, you can choose settings such as:
- UPDATE EXISTING CONTACTS? When a contact in the .csv file already exists in Goldilocks:
- Update that contact with any new information from the .csv file
- Skip that contact. Do not alter fields based on data in the .csv file
- SUMMARY REPORT: When your contact upload has finished processing, we’ll post a message the Notification Center summarizing the results.
- DELETE PERMANENTLY: Please be aware: this action cannot be undone.
** Likely not relevant for leveraging Contact Import Actions
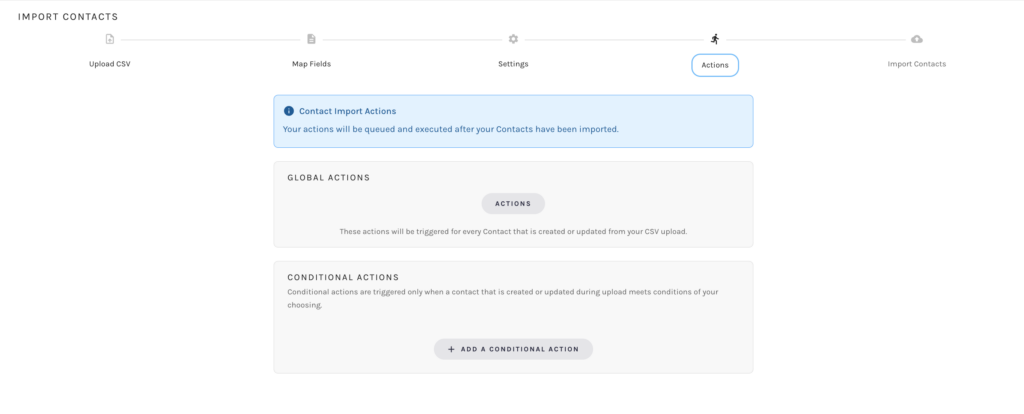
After your settings have been selected, you are taken to the “Configure Actions” tab.

Actions
Within the “Configure Actions” tab, you can set up Global or Conditional Actions.
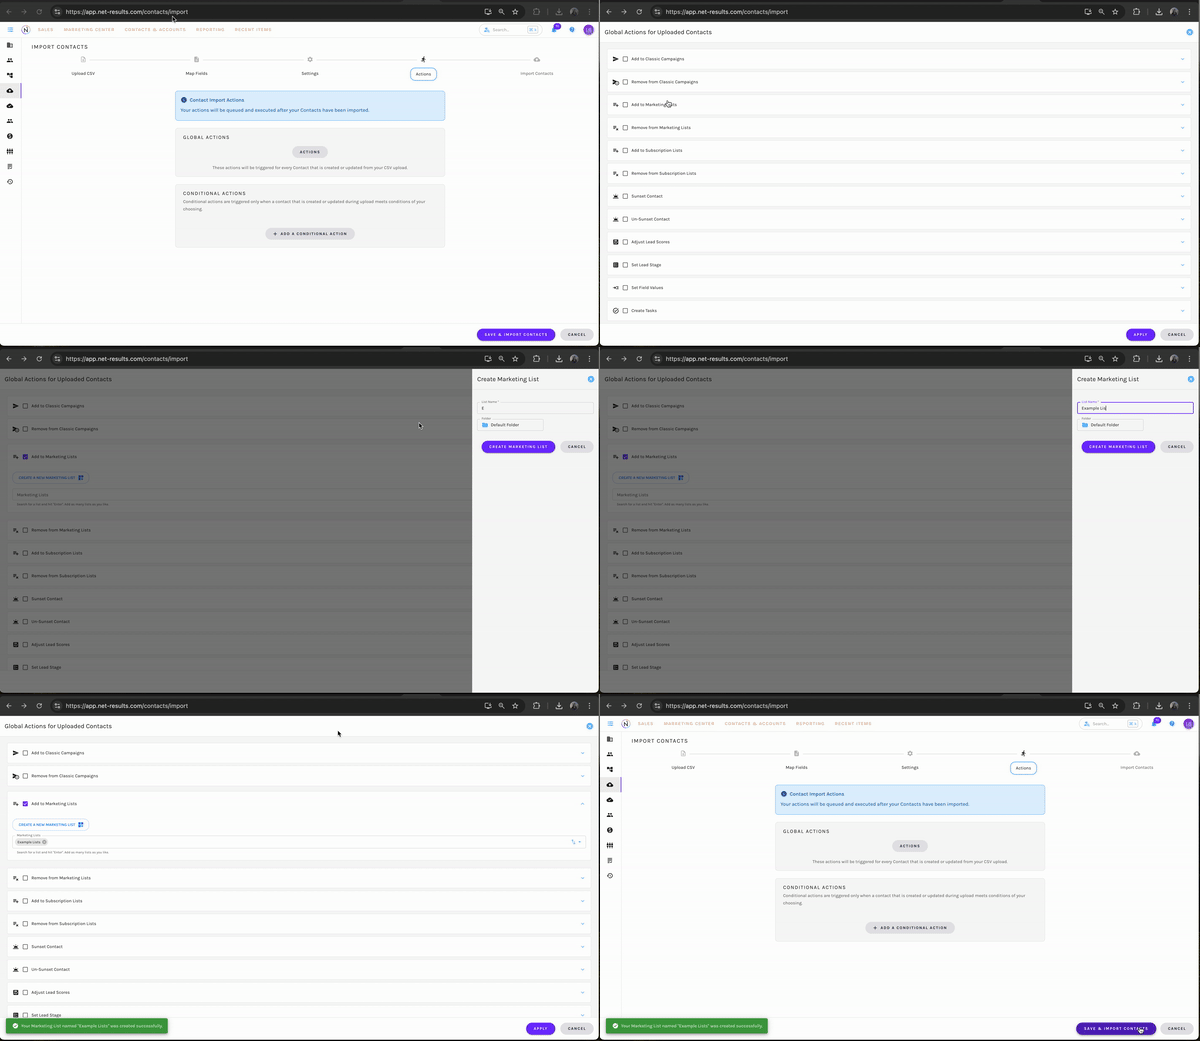
Global Actions occur for all contacts within the upload. IE – Add all contacts from the upload to a Marketing List.

Conditional Actions take place when contacts meet specific conditions of your choosing that have been selected.
- For instance, if you want to assign all contacts whose state does match Colorado, to a specific custom field value, use our Segment builder to select the conditions of Contact Standard Field State Does Match Colorado, and then select a “Set Field Value” Action. Choose the custom field you would like to update for these contacts and set the value for the field.
Add a Conditional Action
To add a Conditional Action, select “Add a Conditional Action”.

Once selected, you will he promoted to add a description. Not required, however, helpful if you will be adding multiple Conditional Actions.
To set the conditions for the action, select “Conditions”. Here you will see the Goldilocks Segment builder, which will allow you to select the conditions you would like to isolate the group of contacts whom the action will take place for.

Once all conditions are set, select “Apply”.
Now, to set the Actions, simply select “Actions”, and you can select from any of the available actions.
Available Actions
The actions available within Global Actions and Conditional Actions include:
- Add to Classic Campaigns
- Remove from Classic Campaigns
- Add to Marketing Lists
- Remove from Marketing Lists
- Add to Subscription Lists
- Remove from Subscription Lists
- Sunset Contact
- Un-Sunset Contact
- Adjust Lead Score
- Send Notification
- Set Lead Stage
- Set Field Values
After the actions have been set, select “Save and Import Contacts” Boom! Upon upload, all contacts within the upload, and any actions set, will have taken place.
Want a live overview of setting these actions up? Email our Customer Success team at support@net-results.com and your dedicated Customer Success Manager would be happy to help!
