How to Create a Form
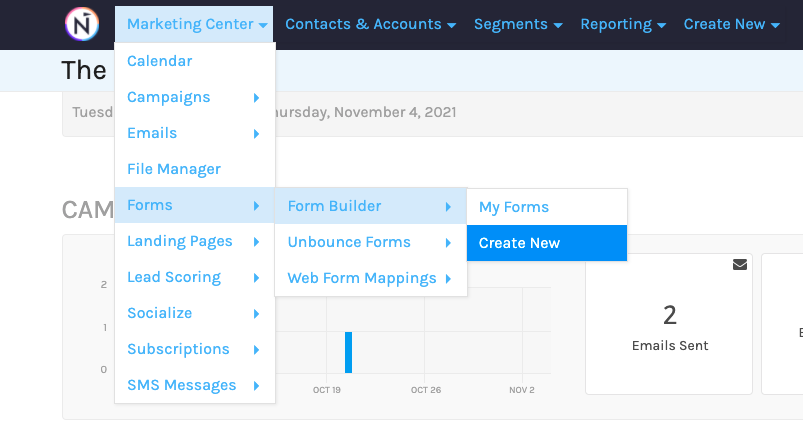
- Marketing Center > Forms > Create New.
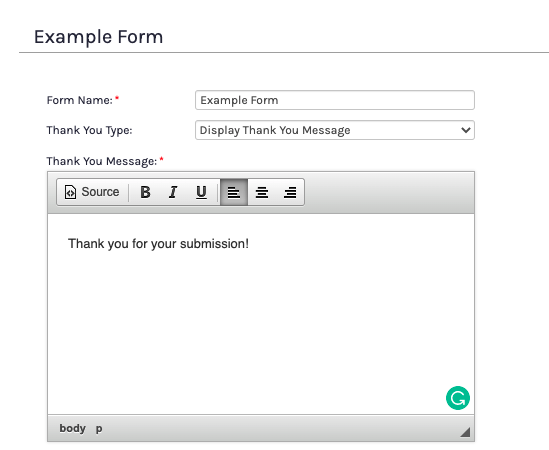
- Name your form & choose a Thank You Type
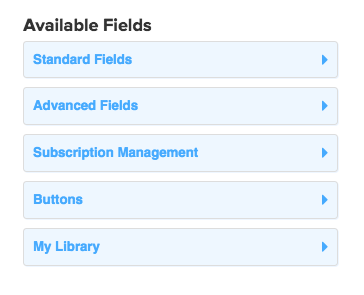
- Add Available Fields to your form by simply expanding the drop down & then clicking the field you would like to add.
- To edit your form field, hover over the field & then select edit. You can also delete & add a form field to My Library when you hover over the field!
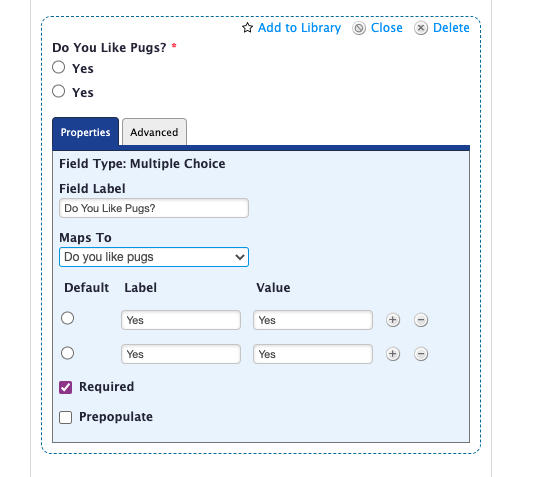
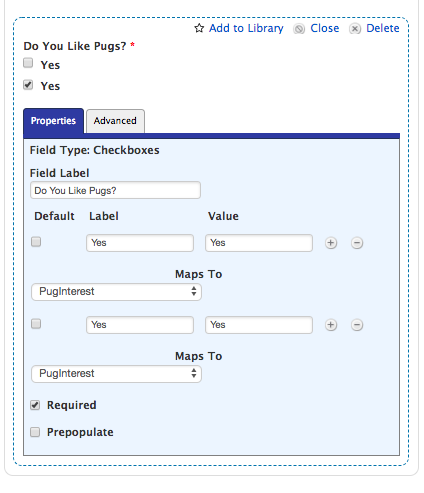
- While editing a field, you can choose settings such as “required” & “prepopulate“. Also, if you are working with fields that require a label + a value, it’s important to note that the label is what the contact will see – the value is what you will want to see in Net-Results. Oftentimes, these two match.
- Additionally, you can “Placeholder text” to the following field types. Placeholder text is text that will show when a contact goes to the form. For instance, for a First Name field you could put “Enter First Name Here”.
- Single Line Text
- Paragraph Text
- Single Line Number
-
- You’ll also see in the screenshot above that the responses are mapped to a specific custom field in Net-Results. You can create as many custom fields as you’d like and map your form responses to them (you can map to standard fields too)!
- Add a Submit button to your form.
- Add some Form Actions to your form to help automate some of your processes (modify list membership upon submission, send notification & so much more!).
- Place your form on a Net-Results Landing Page or embed it on one of your other webpages!
Form Settings
When you initially create a new form, you’ll be greeted with a window that outlines the following settings: Form Name, Thank You Type, Progressive Profiling, and Styling Options.
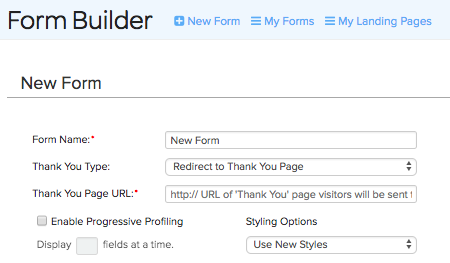
Form Name
This will be how you identify the form within Net-Results on the My Forms page. Contacts will not see the name of the form ever. Being as descriptive as possible here helps to locate your forms much quicker!
Thank You Type
Net-Results offers two types of “Thank you’s” upon form submission: a “Thank You Message” and a “Thank You Redirect”. You can choose whichever option you’d like, right under where you name your form.
Thank You Message
The “Thank You Message” simply fades the form out when a contact submits it and fades in a message that you have created. This means that the URL that you are using to host the form will stay the same – there will be no changes visible to the contact. “Thank You Messages” are for quick, simple messages.

Thank You Redirect
The “Thank You Redirect” will redirect the contact to a completely new URL. If you want to use the Thank You Redirect, you’ll need to create a Net-Results landing page (or have another URL handy) prior to creating the form. You cannot save a form that is leveraging a “Thank You Redirect” without entering in a URL. If you have a decent chunk of information you want to provide to the contact after form submission, this will be what you want to use!
The “Thank You Redirect” option works with both Hosted Source and HTML Source for embedding your form.
Note the URL change below!
Progressive Profiling
Progressive Profiling is a Form Option which reduces the number of fields a prospect sees on a form if that information has already been provided to Net-Results. Conversions matter, and often the best way to encourage a prospect to convert is to remove as many hurdles as possible. Enter Progressive Profiling, Net-Results’ answer to the simpler is better (but I still need to get to know my customers) dilemma. Simply put: Progressive profiling allows you to only display fields that Net-Results doesn’t already have a value for. Theres no need to waste your prospect’s time asking for their name every time you interact and asking them won’t provide you with anything new.
Styling Options
Use New Styles
This styling option will serve our current CSS Styling sheet whenever the page that has this form on it is loaded. Want to make sure that a red error is thrown when a required field isn’t submitted? We got you covered with this styling sheet.
Use Legacy Styles
This styling option uses our previous CSS styling sheet. There is no need to use this styling option unless you already have forms created that have leveraged it in the past!
Use Styles From My Site
Your last style option is to use the current styles from your site. If you’ve got CSS styles for forms on the rest of your site, this option will simply inherit those styles.
Available Form Fields
Form fields are broken up into five different categories: Standard Fields, Advanced Fields, Subscription Management, Buttons, My Library.
Standard Fields
- Single Line Text: Your standard text input for fields such as Email Address, Title & Company.
- Paragraph Text: Also referred to as a “text areaâ€, use this for capturing comments or other long form text.
- Single Line Number: Your standard number input field, for fields such as phone number or company size.
- Drop Down: Also referred to as a pick List, a drop down field allows a person to select one option.
- States: A drop down menu that we created just for you! It has all 50 states in alphabetical order.
- Countries: Just like the states drop down, we wanted to make things easier on you so we created a Standard Field that lists 254 countries.
- GDPR Consent: check box for your customers to provide consent. (Before you use this, make sure you read this documentation)
- Checkboxes: This input allows submitters to select multiple items. However, each individual checkbox you add must be mapped to a different field in Net-Results.
- Multiple Choice: also referred to as radio buttons. Multiple choices are available, but contacts are only able to choose one.
- Hidden: Sometimes you want to capture information that the submitter doesn’t enter; perhaps it’s populated by a script on the page. We can capture hidden fields just fine.
- HTML: Have your own HTML? That’s fine, paste it here!
- Section Break: Inserts a horizontal line for you to break up sections of your form as necessary.
- RECAPTCHA: Built by Google, reCAPTCHA can stop bots from submitting spam via your web forms. reCAPTCHA adds a simple post that your prospects must check to prove they are human. It’s easy for humans to check this box but very hard for bots to do so. Adding reCAPTCHA to your forms will prevent most form spam from getting through while keeping things simple for prospects.
- You may choose whether your reCAPTCHA will have a light (default) or dark background.
- You may choose whether you’d like a normal (default) or small RECAPTCHA in your form.
Advanced Fields

- Name: This option will add the first and last name fields together on a single line and auto-map to first name and last name. Marking this as required will require both fields.
- Address: This option will add (and auto-map) an entire address block including Address 1, Address 2, City, State/Region/Province, Zip and a drop down for Country. In the options for this field you can hide individual pieces as you like, or you can display the entire block, and you can set the entire non-hidden field set as required or none.
Subscription Management

- If you leverage Net-Results Subscriptions, you can add your subscriptions to any form. This allows you to create your own Preference Center or Custom Unsubscribe Page.
Buttons

- You may use either a standard Submit button, or an image in place of a button.
My Library

- A collection of the fields you use most often (like Email Address, Submit Buttons, Company Name). In each field, simply click Add to my Library to save to your Library. Once a field has been saved, it will appear under the My Library Tab on the right.
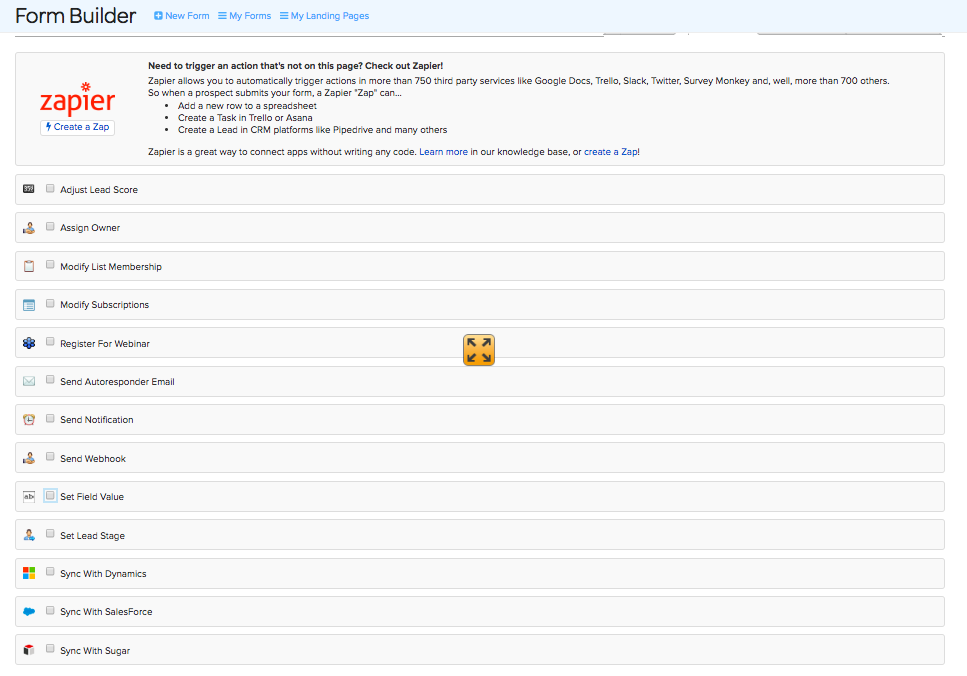
Available Form Actions
The second tab within the Form Builder is where you can find all of the available form actions.
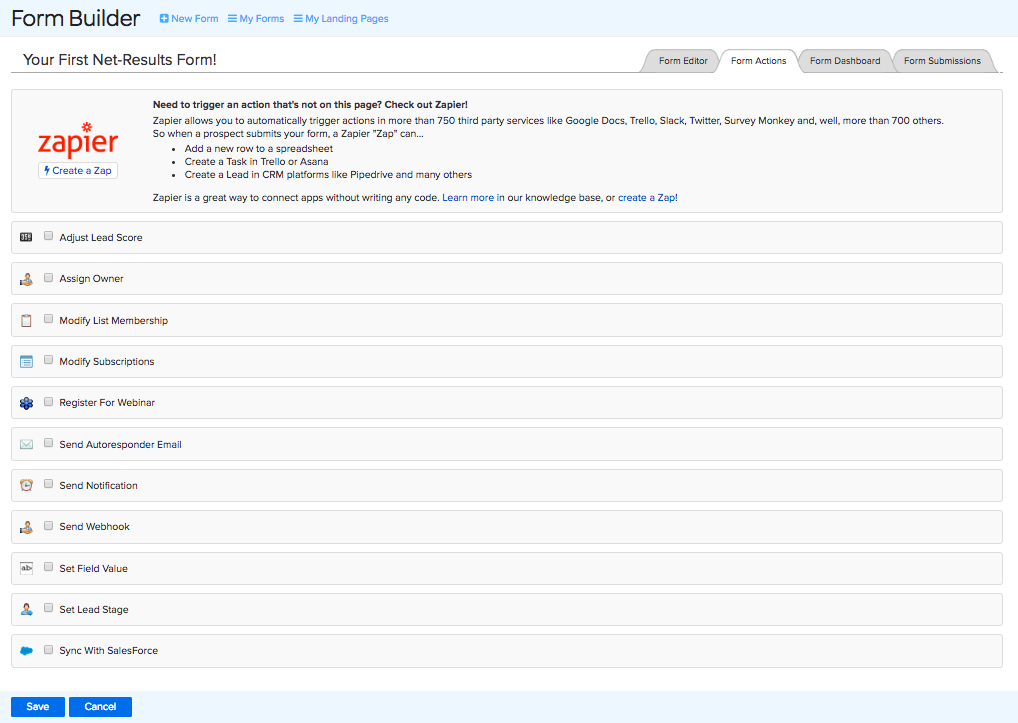
Adjust Lead Score
Increase (or decrease) a Contact’s Lead Score. Being that Net-Results Lead Scores consist of Contact, Activity, and Engagement Scores, you may adjust any of these in any of your existing Lead Score Overlays.
Assign Owner
Assign the Contact to a Lead Owner.
Modify List Membership
Add/Remove the Contact to/from one or more Net-Results lists.
Modify Subscriptions
Add/Remove the Contact to/from one or more Net-Results Subscriptions.
Register For Webinar
If you have the GoToWebinar Integration setup, automatically register the Contact in any of your upcoming Webinars.
Send Autoresponder Email
Use one of your Net-Results Emails as an auto responder. Net-Results will send the email to the Contact immediately when the form is submitted. (read more on Form Autoresponder)
Send Notification
Send an email notification to any email addresses of your choosing. This notification provides all kinds of great detail about the prospect that submitted your form – including how they ended up on your website and the pages they viewed before submitting your form!
Send Webhook
A webhook will send a copy of the data submitted to your forms using an http POST to any URL of your choosing. This is great for technical folks as it allows you to configure Net-Results to push data straight into your custom application, database, or 3rd party application.
Set Field Value
Set a field value that perhaps isn’t part of the form itself (I.E. set CustomLeadScore to “Web Form”).
Set Lead Stage
Set/Change the Lead Stage for the Contact that has submitted your form.
Sync with (Dynamics, Salesforce, Sugar)
Push/update the Contact in your integrated CRM system.