Why Move a Campaign Branch?
Have you ever built out a campaign in Net-Results and then wanted to add an additional branch after you have built everything out?
Have you ever wanted to reorder the branches that you have created in a campaign?
Well, now you can! The new capability of moving campaign branches allows you to do just that.
Moving campaign branches gives you full control over where to place your campaign branches and to add additional campaign branches to an already built out campaign + place them in the exact spot you’d like them to be!
Campaign Types That Allow You to Move Branches
Nurture/Workflow Campaigns allow you to move branches. You can move branches on a One-Time or Perpetual campaign.
You can only move branches in a campaign that are in “Draft” status – meaning, they have not been activated.
Moving a Campaign Branch
Definitions
Before we jump in, we want to provide definitions for some lingo we will be using.
- Parent Branch – This is referring to the branch of the campaign that you want the branch you are moving to be nested under.
- Child Branch – This is referring to any branch that is already nested under the branch you are moving to.
How To
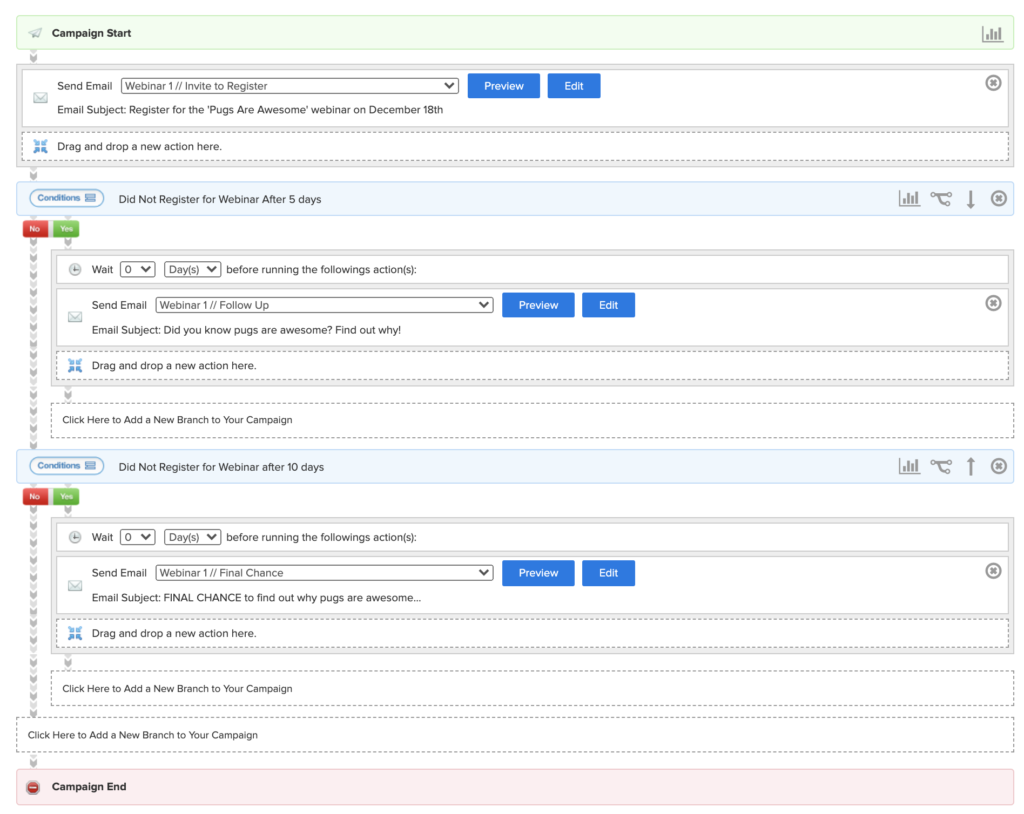
The first thing you will want to do is create your campaign. In the example below, we have created a campaign that sends an email to contact to register for a webinar, then if they don’t register after the first email, sends a “final chance to register” email out to those contacts.
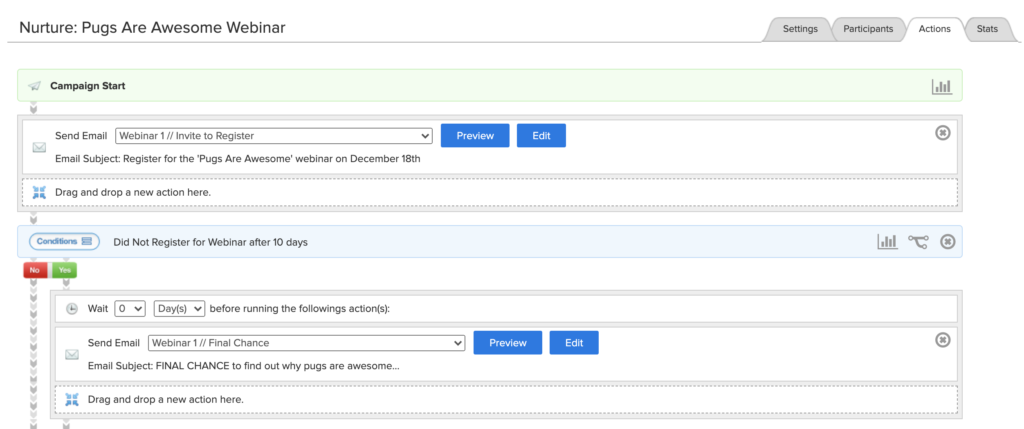
But, after building out this campaign, we decided that we wanted to add an email send in-between the first email and the “final chance” email, giving contacts a little nudge to register before their final chance.
To do this, you will want to add a branch after the “final chance” email by clicking the “Click here to Add a New Branch to Your Campaign” right below the email (the section within the red box below).
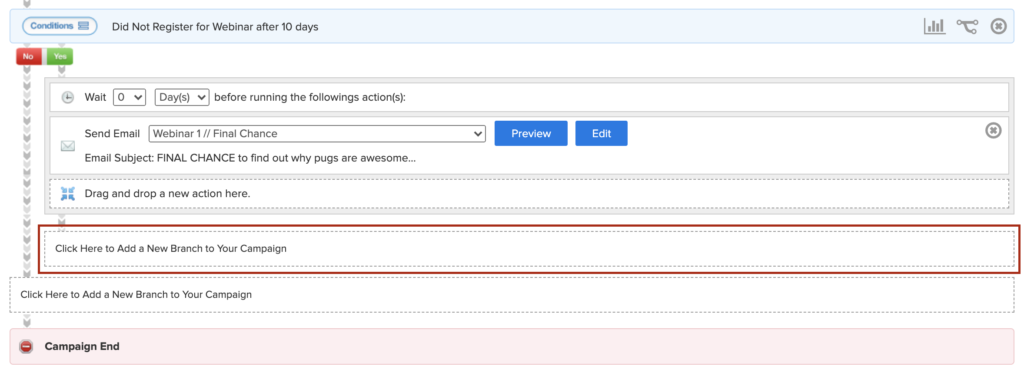
Add your new branch and the additional “follow up” email to your actions. The campaign will now look like the below.
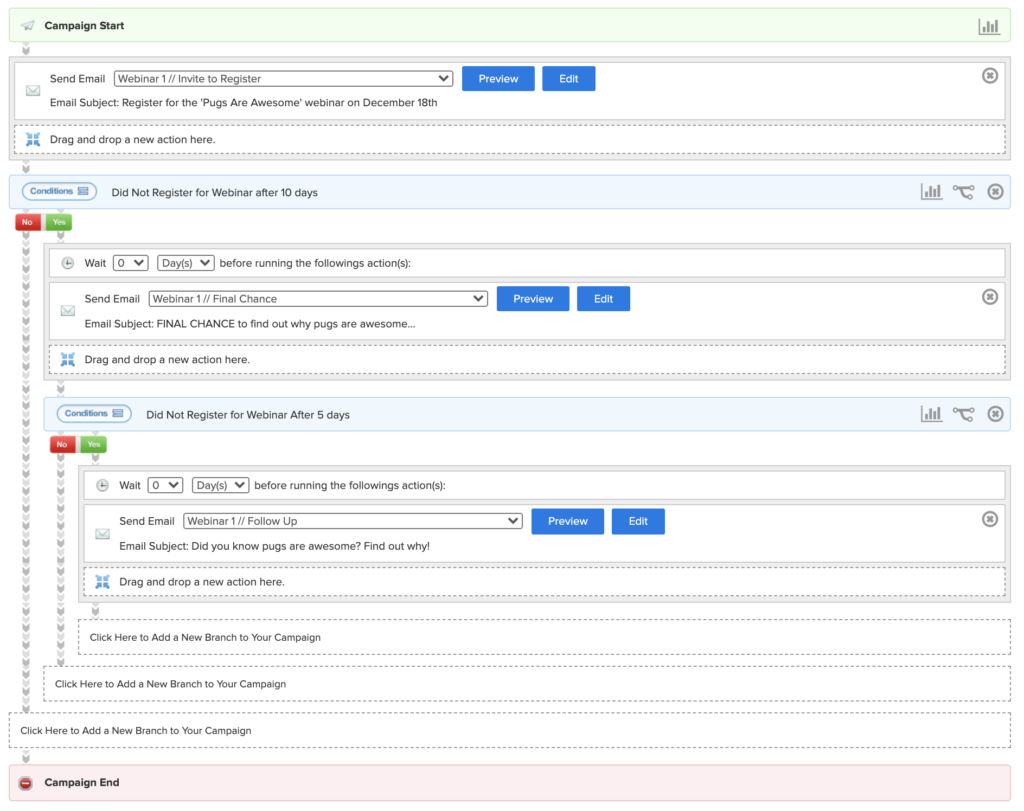
To move this new campaign branch, you’ll want to select the “move” icon on the right-hand side of the branch itself. The icon is below!

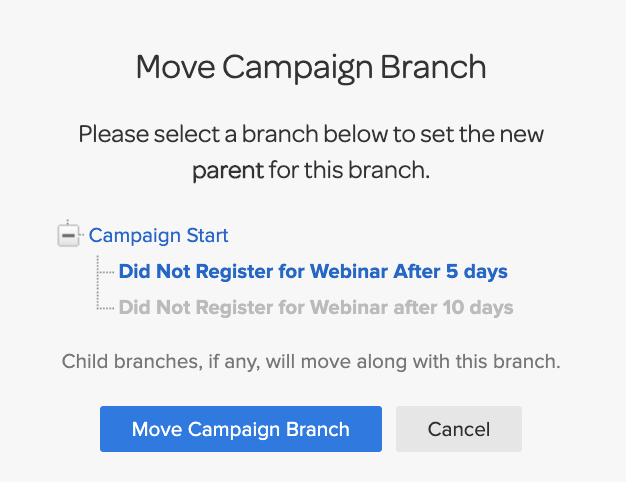
When this icon is selected, a modal will appear asking you where you want to move this branch.
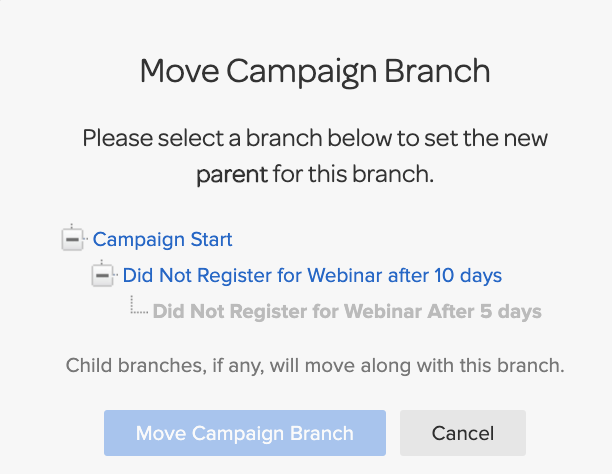
So, in our example, if we want to inject a “follow up” email before the “final chance” email, we will want to select “Campaign Start” as the new parent branch.
When you select the the branch you’d like to set as the new parent, the branch name will become bold, and the “Move Campaign Branch” button will become clickable.

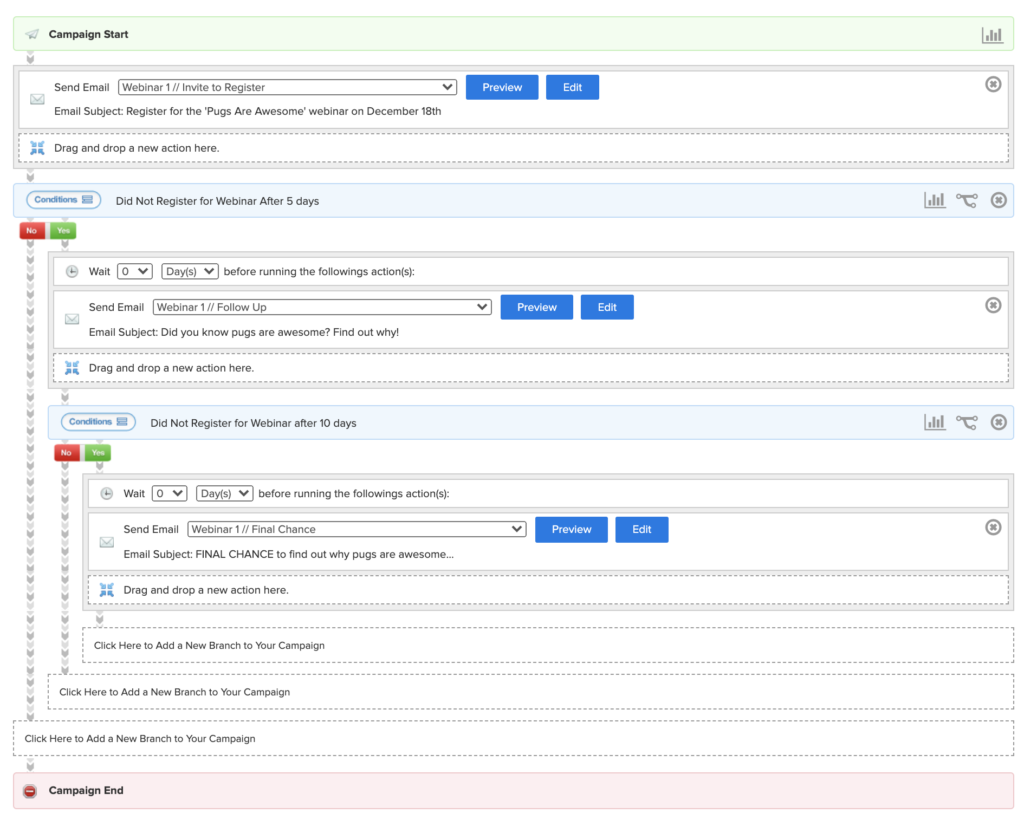
Select the “Move Campaign Branch” button. The campaign will reload automatically. It will look like the below.
Looking at the campaign, it still isn’t quite where we want it to be. This is because the parent branch of the “final chance” email is still set to Campaign Start, just like the “follow up” email is. We need to change the parent branch of the “final chance” email to the “follow up” email branch.
To do so, you’ll select the “move” button on the “final chance” email branch, and make the select the “follow up” branch as the parent, the modal that appears would look like the below:
Hit that “Move Campaign Branch” button and watch your campaign become organized exactly as you wanted it! The structure of the campaign will look like the below now, with the “final chance” email as the child branch to the “follow up” email.
As always, we are here to help. If you have any questions about this new, fantastic capability shoot us an email at support@net-results.com and we will be happy to assist!