Image Folder Use
The image folder is a dedicated folder within your File Manager that is for images only. Images uploaded to the Image Folder should be finalized images.
You cannot upload non-image-specific files types, such as .pdf, to the image folder. If you attempt to do so, an error will be thrown letting you know it is not a supported file type! These other file types belong in the Assets folder.
How To Upload An Image
- Navigate to the Marketing Center -> File Manager
- Ensure that the Image Folder is selected. Then, select the blue “upload” button in the upper left hand corner.
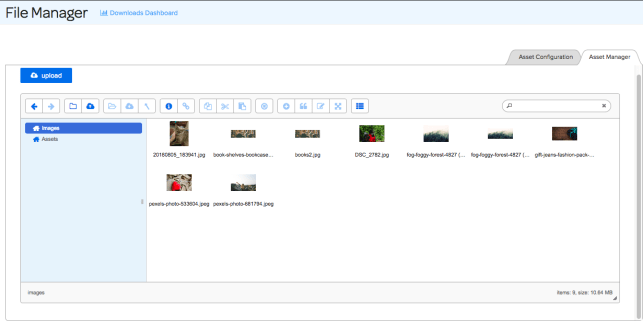
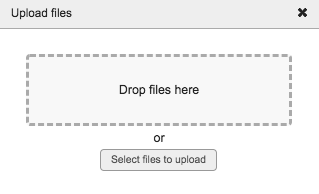
- Upon selecting upload, a module will appear where you can either drag a file or select to find the file on your computer and upload it!
Available Image Options
When you right click on an image in the Image Folder, a menu will appear that has a few available options; it’ll look like the below:
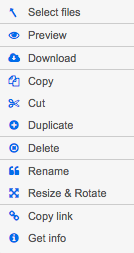
- Select File – select the current file.
- Preview – catch a glimpse of the current file before adding it to an email or landing page.
- Download – download the file to your computer.
- Copy – copy the file.
- Cut – cut the file.
- Duplicate – duplicate the file within the image folder.
- Delete – remove the file from the image folder.
- Rename – rename the file within the image folder.
- Resize & Rotate – Gives you the ability to resize and/or rotate the image. This option should only be used for minor tweaks to an image.
- Copy Link – Allows you to copy the link path to the image within the image folder.
- Get Info – Allows you to easily see the size, path, link, dimensions, last modification date, permissions for the image & whether it is locked or not!
Check out this video to learn more!