What is an A/B Split Test Campaign?
A/B Split Test Campaigns are most commonly used to gauge performance for different subject lines, different versions of content, or CTA placement within an email. With Net-Results, the setup is straightforward and only relies on a few settings!
Good use cases for an A/B Split Test Campaign include (but are not limited to):
- Testing two different subject lines to see which gets better open rates
- Testing different content in an email to see which gets better click rates
- This could be different wording or different images!
- Testing different placement of a CTA button within an email, to see which placement gets a higher click rate
Settings Tab
When you first create any type of campaign in Net-Results, you’ll be taken directly to the Settings tab. The settings tab consists of some high level settings about how you’d like the campaign to work. Options such as One Time or Perpetual, choosing the launch date, and UTM tagging are all available here. Below is a list of the items that are on the settings tab.
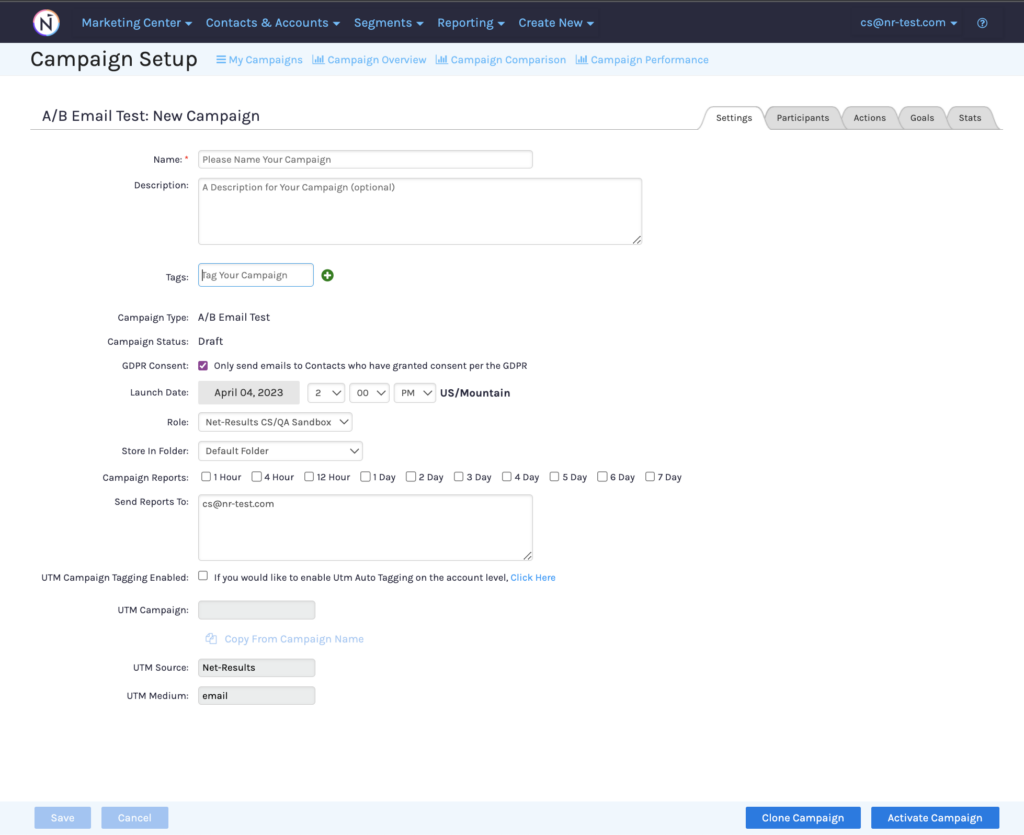
Setting Definitions
- Name – Name the campaign. We suggest being specific so that you can easily tell what this campaign was in the future!
- Description – If you’d like to write a description of this campaign, you can do so here.
- Tags – Tagging campaigns with a keyword that identifies the campaign can be helpful for future reporting! If you send monthly newsletters, tagging the campaigns with “monthly newsletter” will allow you to pull a report for all campaigns tagged with “monthly newsletter” in the future!
- Campaign Type – This is an uneditable option, this option will just let you know whether you are working in a Drip, Nurture or A/B Split test campaign.
- GDPR Consent – When GDPR rolled out back in May of 2018, we implemented a few features that will help our clients who work with EU citizens stay compliant. If you check this box, it means that this campaign will only send to contacts who have the GDPR Consent Field on their contact detail set to True.
- Contacts do not have this field set automatically. It is left blank until a workflow is set up to set this field. Do not check this box unless you are actively using the GDPR consent field.
- Launch Date – Choose your launch date! You can set a launch time by 5 minute increments here!
- Retirement Date – Only used when working with Perpetual Campaigns. Here is where you can choose whether you would like the campaign to never retire, or if you’d like it to run perpetually for a set amount of time and then retire. The options you can choose from are listed as:
- Do Not Automatically Retire
- Automatically Retire On (you set the date)
- Role – You’ll have two different roles, one that is a generic company level role & one that is specific to your user. If you change the role to be specific to your user, that means that no one else on your team that logs in to Net-Results will see the campaign you are creating. It will only be visible to you.
- In most cases, Role is safe to ignore. You will see it a few places in Net-Results. If you do not need to remove visibility to the content that is created in Net-Results, leave the Role alone. 🙂
- Store In Folder – You can organize campaigns in folders so that you can easily find them on the My Campaigns page. You will need to create the folder ahead of time on the My Campaigns page, but you can select it on the Campaign Settings tab!
- Email Delivery Windows – Gives you the ability to send emails only on specific days and even only during certain times of the day. Something to note with delivery windows is when leveraged, it will delay the emails sends by one hour. This is a check put in place to ensure we are not delivering emails outside of your windows.
- Campaign Reports – Instead of creating a scheduled report, you can go ahead and choose to get a campaign report right from the Campaign Settings tab! You can choose who to send the report to and you can send to multiple users by separating them with a comma.
- UTM Campaign Tagging Enabled – You can enable UTM tagging on a campaign by campaign basis by checking this box, OR you can enable automatic UTM tagging on the account level.
Participants Tab
You guessed it! The participants tab is where you will decide which contacts will be able to qualify for the campaign. This could be something as simple as a list of contacts, or as complex as a built out segment identifying contacts based on an assortment of conditions for this campaign. When working on the participants tab, you will have two views: Simple and Advanced.
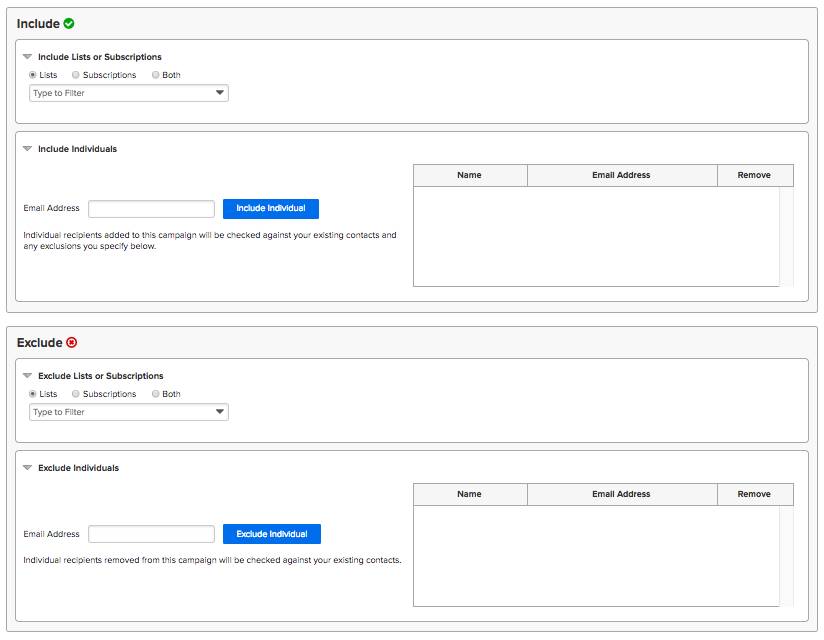
Simple View
This will be the default view when you first navigate to the participants tab. When working on the Simple View, you can only include/exclude lists, subscriptions or specific individuals. It will look like the screenshot below:
Advanced View
You can toggle to the advanced view by hitting the radio button in the upper left hand corner by “Advanced”. This will take you to a screen that looks almost identical to our Segmentation Engine.

If you’ve already built out a segment using our Segmentation Engine, you can import it here by hitting “Import from Existing Segment”. If you’ve spent a lot of time building out criteria in a campaign, you can export the segment to the My Segments page by hitting the “Export As A New Segment”.
The Advanced View is where you can build out criteria such as:
- Lead Stage Does Match “Prospect” AND State Does Match “Colorado”
The above means that only contacts who have a lead stage of “prospect” and a state that matches Colorado will qualify!
There are a lot of different conditions that you can segment off of, to learn more about those check out our Segments section!
Actions Tab
A/B Split Test Campaigns feature a simple layout on the Actions tab that looks and acts much differently than that of a Drip Campaign or a Nurture/Workflow Campaign. When you initially go to the actions tab, you’ll be greeted with an area that looks like the below:
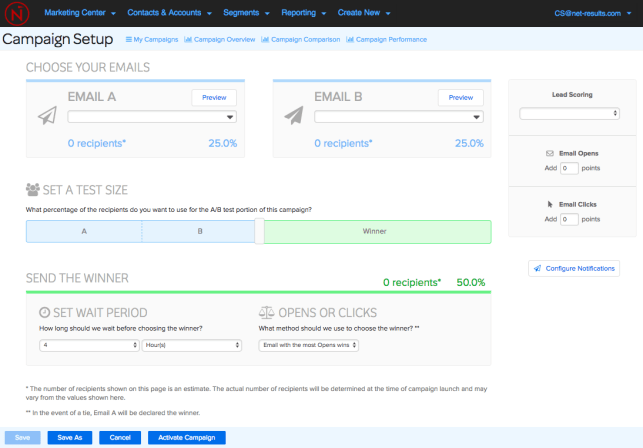
Setting Up Actions
- The first thing you’ll need to do is choose your emails.
- Next, you’ll want to set the “Test Size”. We automatically set the test size to 25% for each email, but you can drag that bar to the right or left to adjust to your liking!
- The last thing you need to do is tell the system how you want the winner to be determined and how long you would like to pass before the system determines the winner. Your options for choosing the winner are:
- Email with the most Opens wins.
- Email with the most Clicks wins.
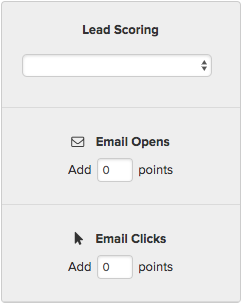
Lead Scoring
You can choose to add some lead scoring rules on the fly in a Drip Campaign by heading to the actions tab. You can specify the amount of points you’d like to add for when an Email is Opened or when an Email is Clicked. If you leverage multiple lead scoring overlays, you can choose which one you would like this score applied to. The module will be located on the far right of the screen within the Actions tab.
Stats Tab
Here is where you can see all of the fun stuff after your campaign has been launched! When you first navigate to the stats tab you’ll be greeted with a screen that has three separate parts:
- Top Navigation Bar
- High Level Campaign Information
- Nitty Gritty Campaign Stats
Top Navigation Bar

Starting from the far left, we’ll go over what all of these pieces do & how they can interplay together.
- The furthest left dropdown is where you can switch campaigns and take a look at stats for another campaign!
- Next, the date range. It’s important to always pay attention to the date range! If your stats ever look a little funky to you, check out the date range and make sure it is set to encompass the days when any activity could have occurred!
- The drop down on the far right is where you can apply a specific segment. Did you send an email to a list of contacts that are from all over the country and now you are interested in seeing how contacts in Colorado interacted with your campaign? If you build a segment that has “State does match Colorado” as the condition, you can apply that segment here and see your stats reflect that segment!
- Just below this drop down is a little button that says “Download”. This button allows you to download a PDF of this page allowing you to easily email it to your team!
High Level Campaign Information
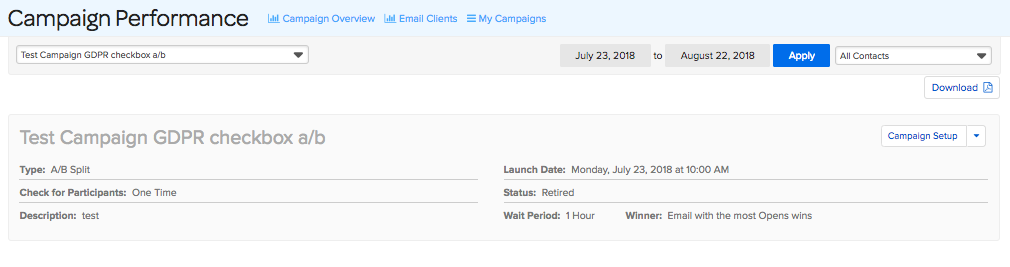
Below the Top Navigation Bar is where you can find some quick high level information about your campaign.
- Type – This will tell you the exact type of campaign that you are looking at stats for
- Check For Participants – Are you checking for participants just one time when the campaign launches? Or are you checking Perpetually? Here is where we will tell you!
- Description – If you choose to write a description on the Settings tab, it’ll show up here!
- Launch Date – The exact launch day and time!
- Status – This is where we will tell you if the campaign is Retired, Active, Under Construction or Paused.
Nitty Gritty Campaign Stats
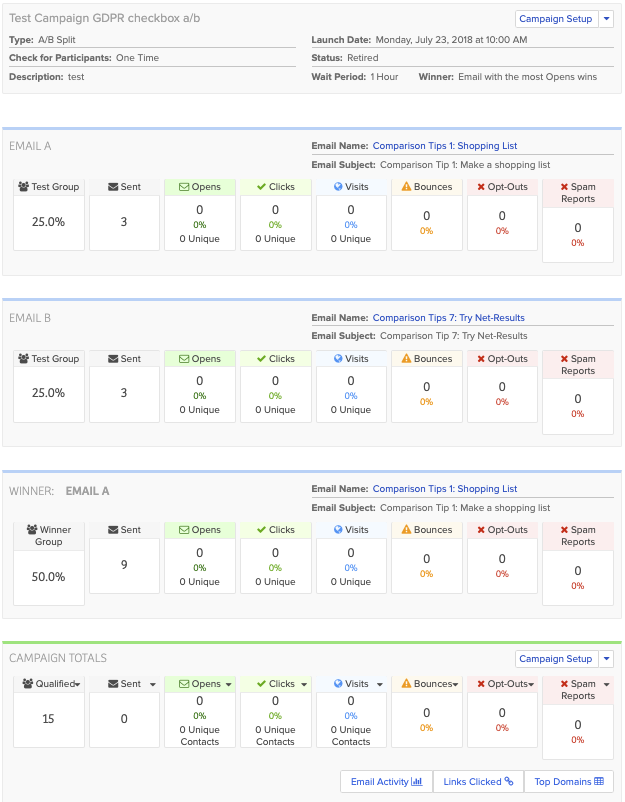
Lastly, the Nitty Gritty Campaign Stats. For an A/B Split Test Campaign, things look a little different. You will see four sections when you come to the stats page:
- Email A
- Email B
- Winner
- Campaign Totals
All of these sections have the same categories of stats within them.
- Qualified – The amount of contacts that qualified for the campaign. An important note is that this will encompass any contact that qualified, whether they are mailable or not.
- Sent – The amount of emails that were actually sent out.
- Opens – The amount of unique opens that have occurred.
- Clicks – The amount of clicks that have occurred. In this box, we let you know how many actual unique contacts clicked within the email.
- Visits – The amount of visits that occurred from this email. These will be contacts that clicked through to your site and spent time browsing.
- Bounces – The amount of emails that bounced when the system attempted to send. In Net-Results, we will attempt to send an email 3 times. If we are unsuccessful three times it is marked as a hard bounce which would be recorded here.
- Opt Outs – The amount of contacts that unsubscribed from communications in this campaign.
- Spam Reports – The contacts that marked your email as “spam” in their email client.
Check out this video to learn more!
