Setting Your Email Preferences
Setting up your Email Preferences will save you effort every time you begin to work on a new email, and especially when the time comes to send out test emails. Email preferences allow you to save a list of default recipients for your test emails, as well as set a default reply-to label & reply-to address. This eliminates the need to re-type (or paste in) the email addresses of your test recipients every time you need to send a test email.
To set up or change your email preferences, you will want to take the following steps:
- Hover over “Marketing Center” then “Emails” then select “My Emails”.
- Once on the “My Emails” page, click the button for “Email Preferences” at the top of the screen.
- The “Email Preference” module will appear on the screen with several options to fill in.
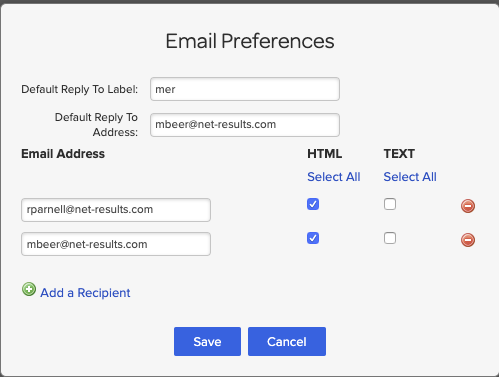
- You can add as many recipients as you’d like by selecting the “Add a Recipient” button.
- The HTML and Text checkboxes refer to whether you want the recipients to receive both the HTML and Text version of the email when you send out the test.
What different Email types can I use?
When you choose to create a new email, you will be presented with three options:
- My Templates
- Templates
- Custom HTML
A collection of templates made by you to save for future use. They can be as detailed or bare-boned as you prefer. A common one is a header & footer combination that is used on marketing emails.
These are templates that we have created for you to leverage our drag & drop builder. Using these templates saves you a considerable amount of time, as it gives you a working "skeleton" to start from. Just fill in the blanks!
If you enjoy writing HTML, or have content that has already been coded from your design team- Custom HTML builder is for you. You can paste in the original HTML and see the email render! Another use of the Custom HTML builder is to create emails that look more like they were sent from a personal email, rather than a marketing email.
What do all of these Email Settings do?
First and foremost, we need to define a few things:
- Email Name: This is the label that you will see on the “My Emails” page in Net-Results. Be descriptive here, so that you and your team know exactly what’s in the email.
- Email Subject: The subject line you want to appear for this particular message.
- From Label: This is user to specify “who” the email is from. Typically it contains a person’s name, a company name, or both. With an integrated CRM system, it’s very effective to personalize this field with the Lead Owners First & Last name.
- Reply-To Address: The address where any replies to the email will be sent. This is different than the From Address and is subject to our Domain Branding setting. Please contact support if you are unsure if this setting has been enabled for your account.
- Subscription: This is used to define the type of category of this email. Such as whether it’s a Newsletter or Special Offer. For more details on this, click through to our Subscriptions Documentation.
- Role: This is used to privatize the email to one user. If you set the role to you, no other users will be able to see/modify/use this email.
- Store in Folder: Choose which folder this email will be stored in. Folders help you stay organized. Click for more on Folders.
- Enable as a CRM Template: This option allows the content you’re creating to be sent as a Conversation Email (via integrated CRM system or API only).
- Transactional Email: This option allows the email to be sent without a Postal address or Unsubscribe Message. This should only be enabled if your content is not marketing.
- Publish via URL: This option allows you to create a permalink to the email you have just created. This allows you to send this link to your colleagues so that they can review the email!
- To use this, select the checkbox beside the text “Publish via URL”. A URL will appear that ends with the email address of the user that is logged in.
- Click that URL & you will be taken to a webpage that has the email content on it.
- Once on the webpage, you can change the email address at the end! This allows you to use one of your Contact’s email addresses to see how any Personalized Fields populate!
- You may send this URL to anyone that would like to review the email prior to you sending it out via a Campaign!

Email Building Blocks
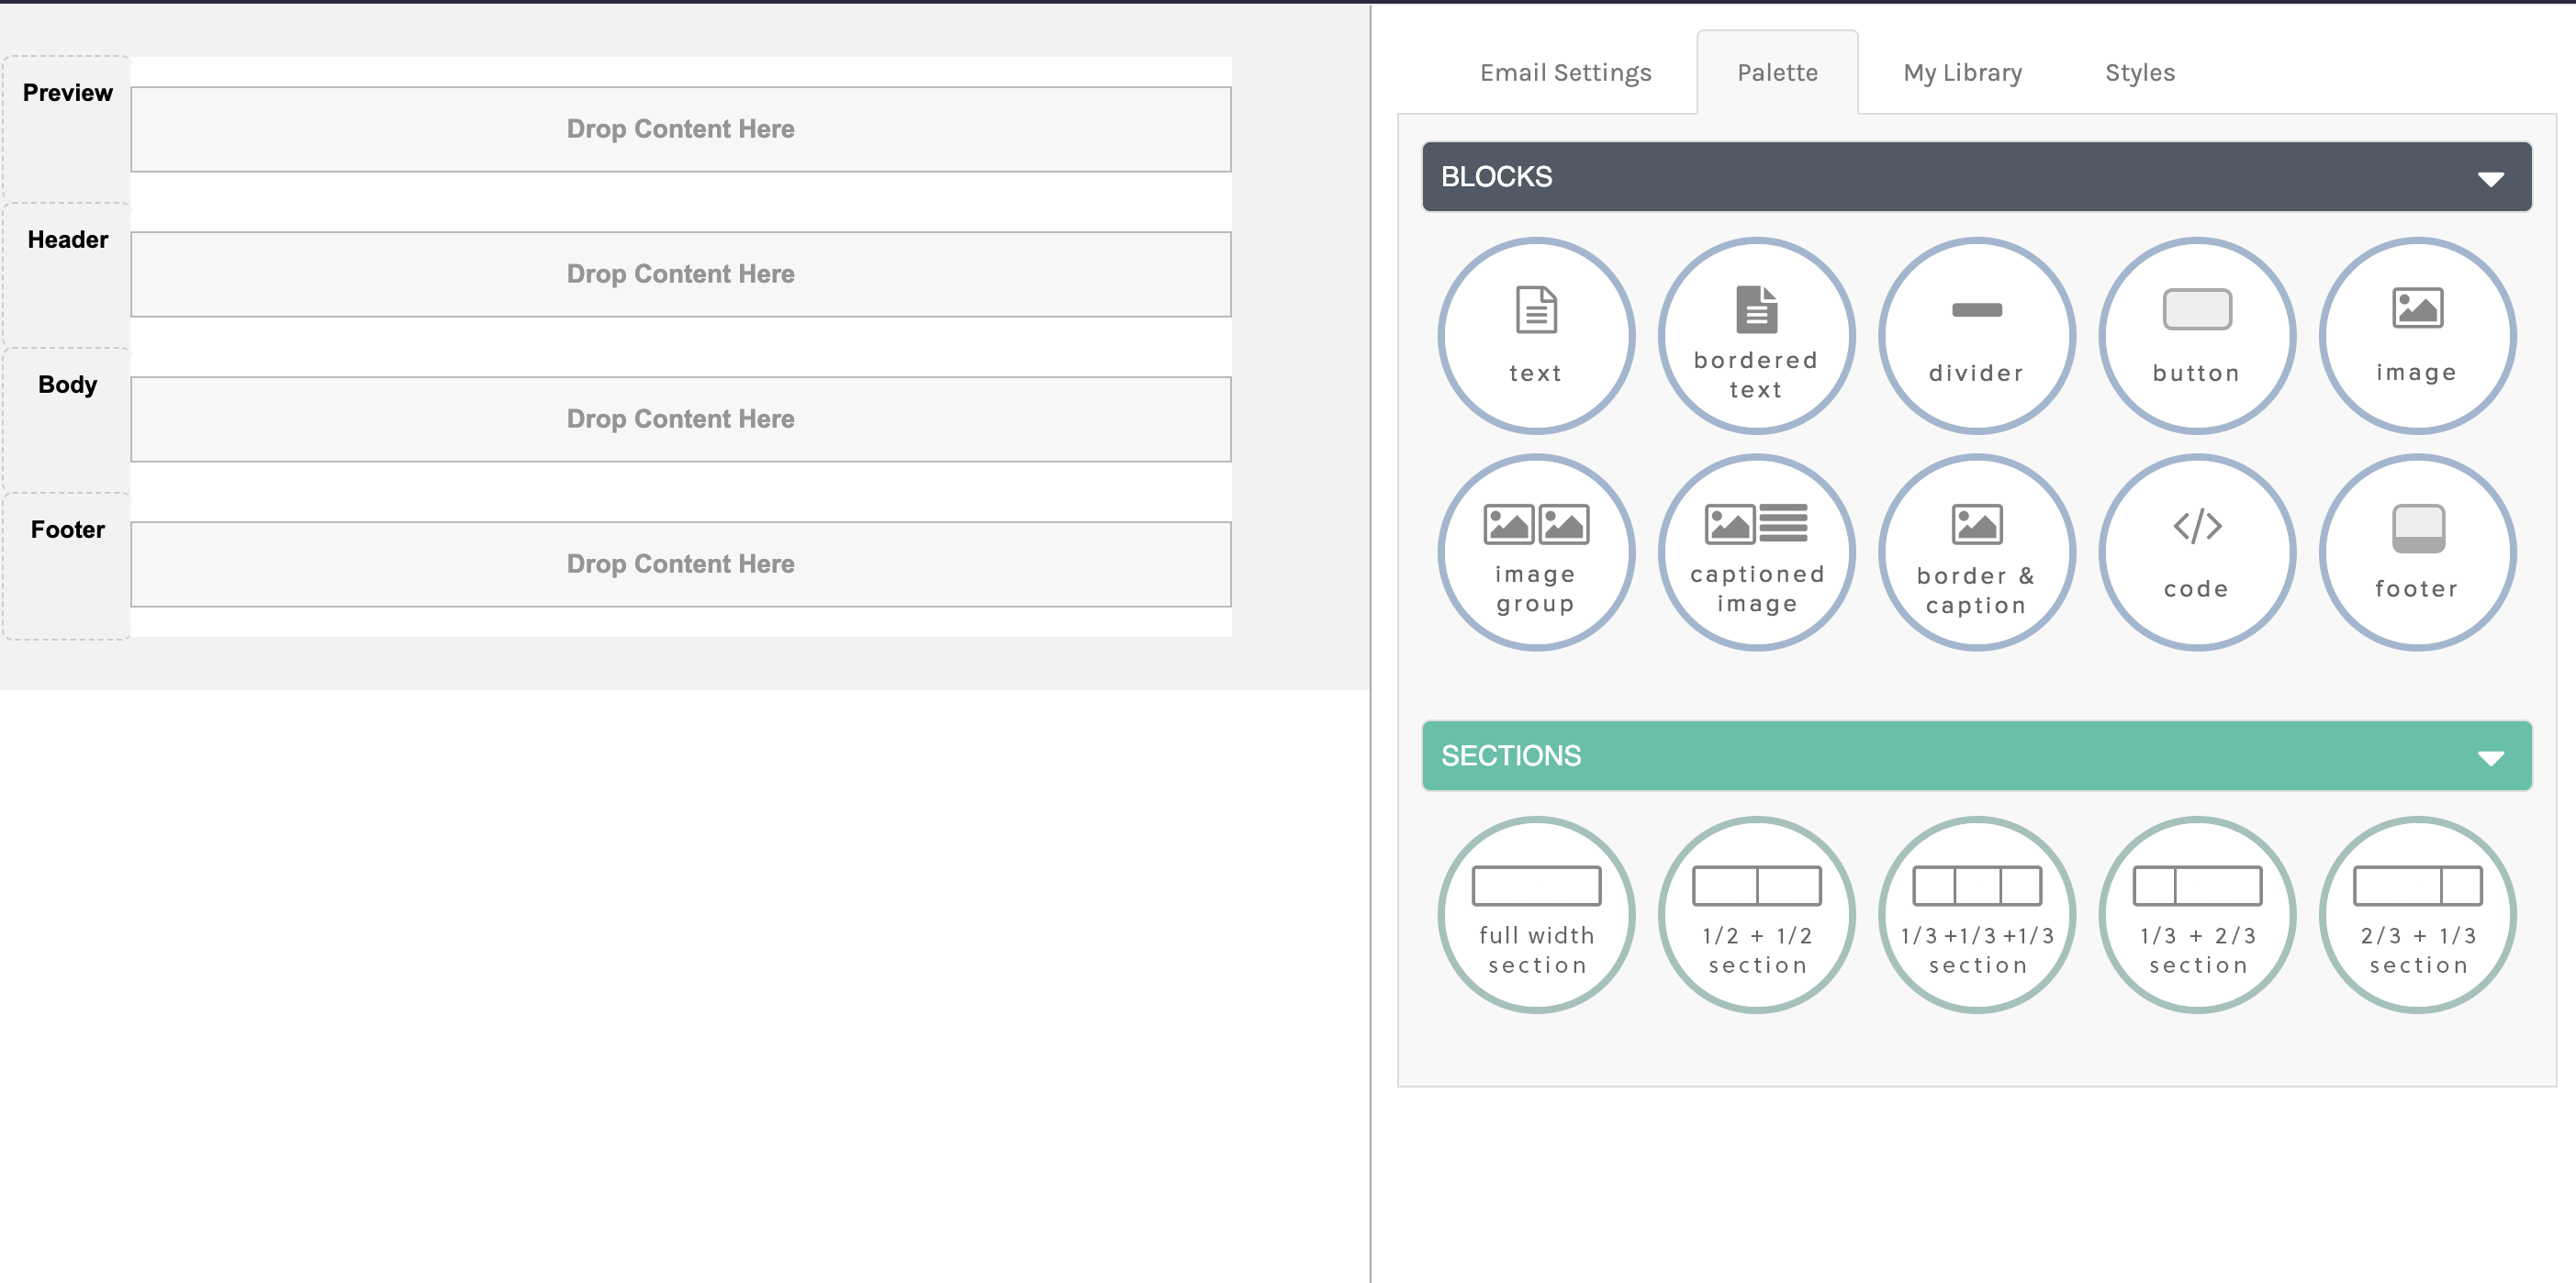
Build Your Email Blueprint. You will see a few tabs beside “Email Settings” over to the right of the building area, they are listed below:
- Palette
- My Library
- Styles
The Palette Tab consists of two options:
Rows which make up the blueprint of the email. Rows help you design the structure of the email before adding in the different types of content you would like.
Blocks are what you add to rows. Blocks dictate the type of content that you would like to.
CS Quick Tip: It is easiest to plan out what rows you are going to want to add to your email & then add the blocks to each row. If you add multiple blocks to one row, you will not be able to add a row in-between those blocks if a design change is needed to be made.
The My Library tab is especially useful for saving blocks of content. Use cases for this could include a header or footer for an email. If your company uses the same header & footer for all emails, create them one time and save to My Library.
CS Quick Tip: Blocks save to your library are NOT global. Meaning, if an edit is made to that block, it will not update across all emails.
The Styles tab is where you can add overarching design rules to your email. These styles can be added on the Page level or on each section of the email (Preview, Header, Body, Footer).
CS Quick Tip: Styles that you add on the block level will override the styles being applied on the Styles tab.
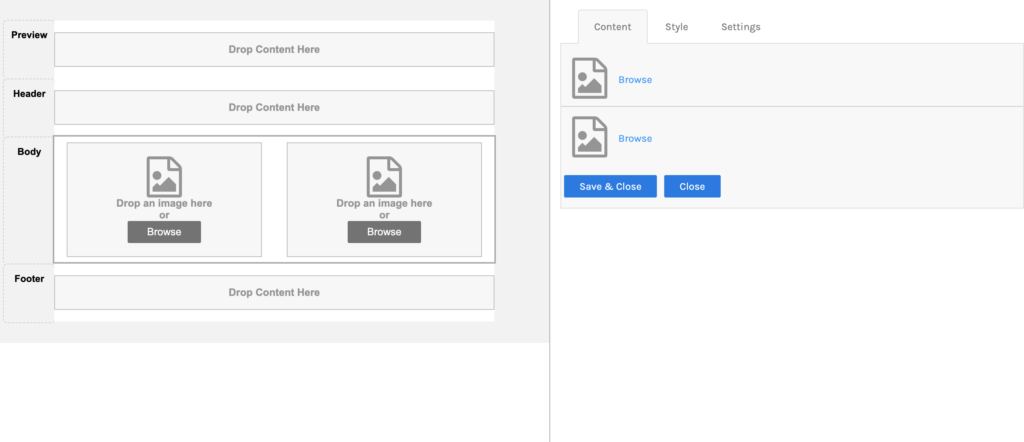
How to add Images to an Email
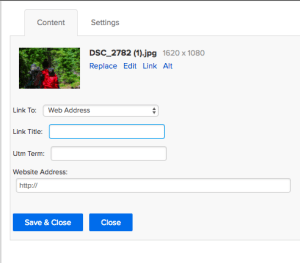
To add an image to your email, hit browse on the image block or browse on the right-hand side after you have dropped the image block in the row.
When you add an image, you are also able to hyperlink it to a webpage. When adding a link to an image, you can also assign a UTM term to that link. Need to learn more about UTM Tagging? Click here.
Have an image to use as your CTA? Check out our blog post on CTA Do’s and Dont’s.
Anchoring in Emails
To anchor a specific section in your email, follow the directions below:
- Add a text block to the row in your email.
- Add your content. Select the text and/or image within that block that you would like to anchor to. Select the flag from the top navigation while editing the text block.
- Navigate to the section of the text block that you would like to link to the anchored image/text & edit the hyperlink.
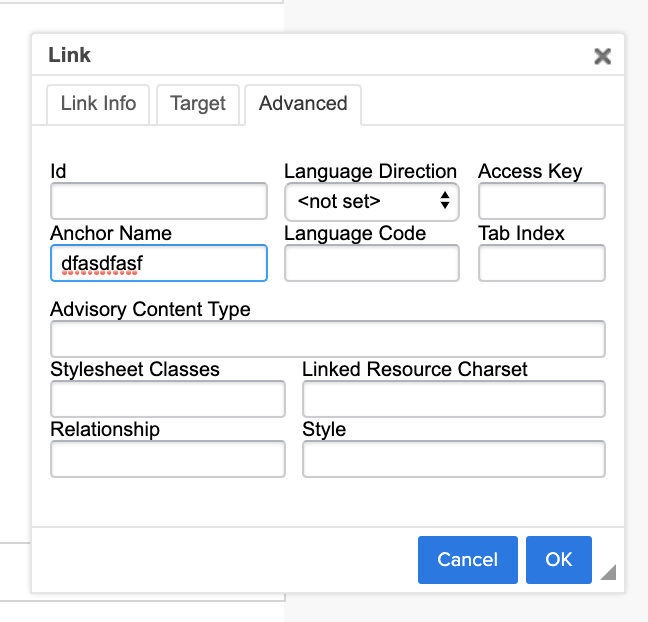
- Under the advanced tap of the link editor, enter in the anchor name that you just created and select “Ok”
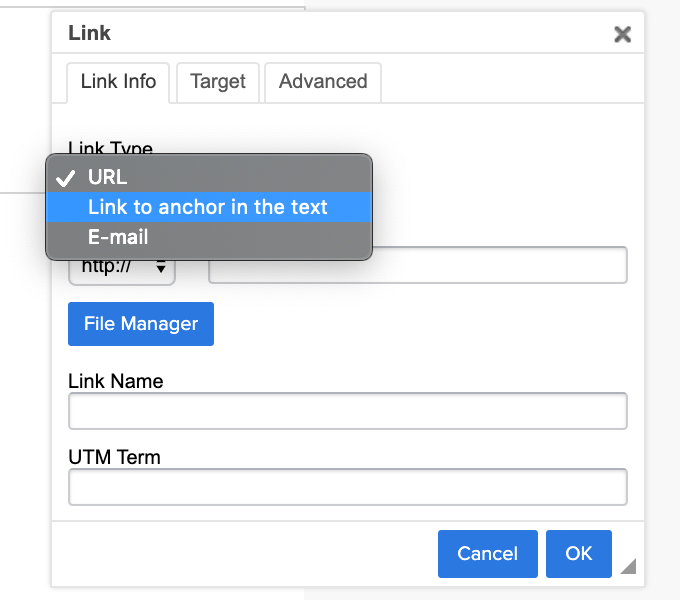
- Next, edit the link again and on the “Link Info” tab, change the link type to “Link to Anchor in the Text” a dropbox will appear that will allow you to select the anchor you just entered in!
How to create your Footer
As part of the CAN-SPAM Act, it is required that a Postal Address & Unsubscribe Message are in your email.
Have you seen this alert when you save your email?

That’s because there is no “Unsubscribe” personalized field in your email. Just like adding a personalized field for first name, you need to add one for Unsubscribe & Postal Address.
- Add a text block to your footer.
- Select “Personalized Fields” & under the “Email Fields” section, select Postal Address & then Unsubscribe Message.
- The Unsubscribe Message will allow you to select a Landing Page. The only landing pages that will be available to be selected are those that have a form on them that has a “Subscription Management” form field on it.
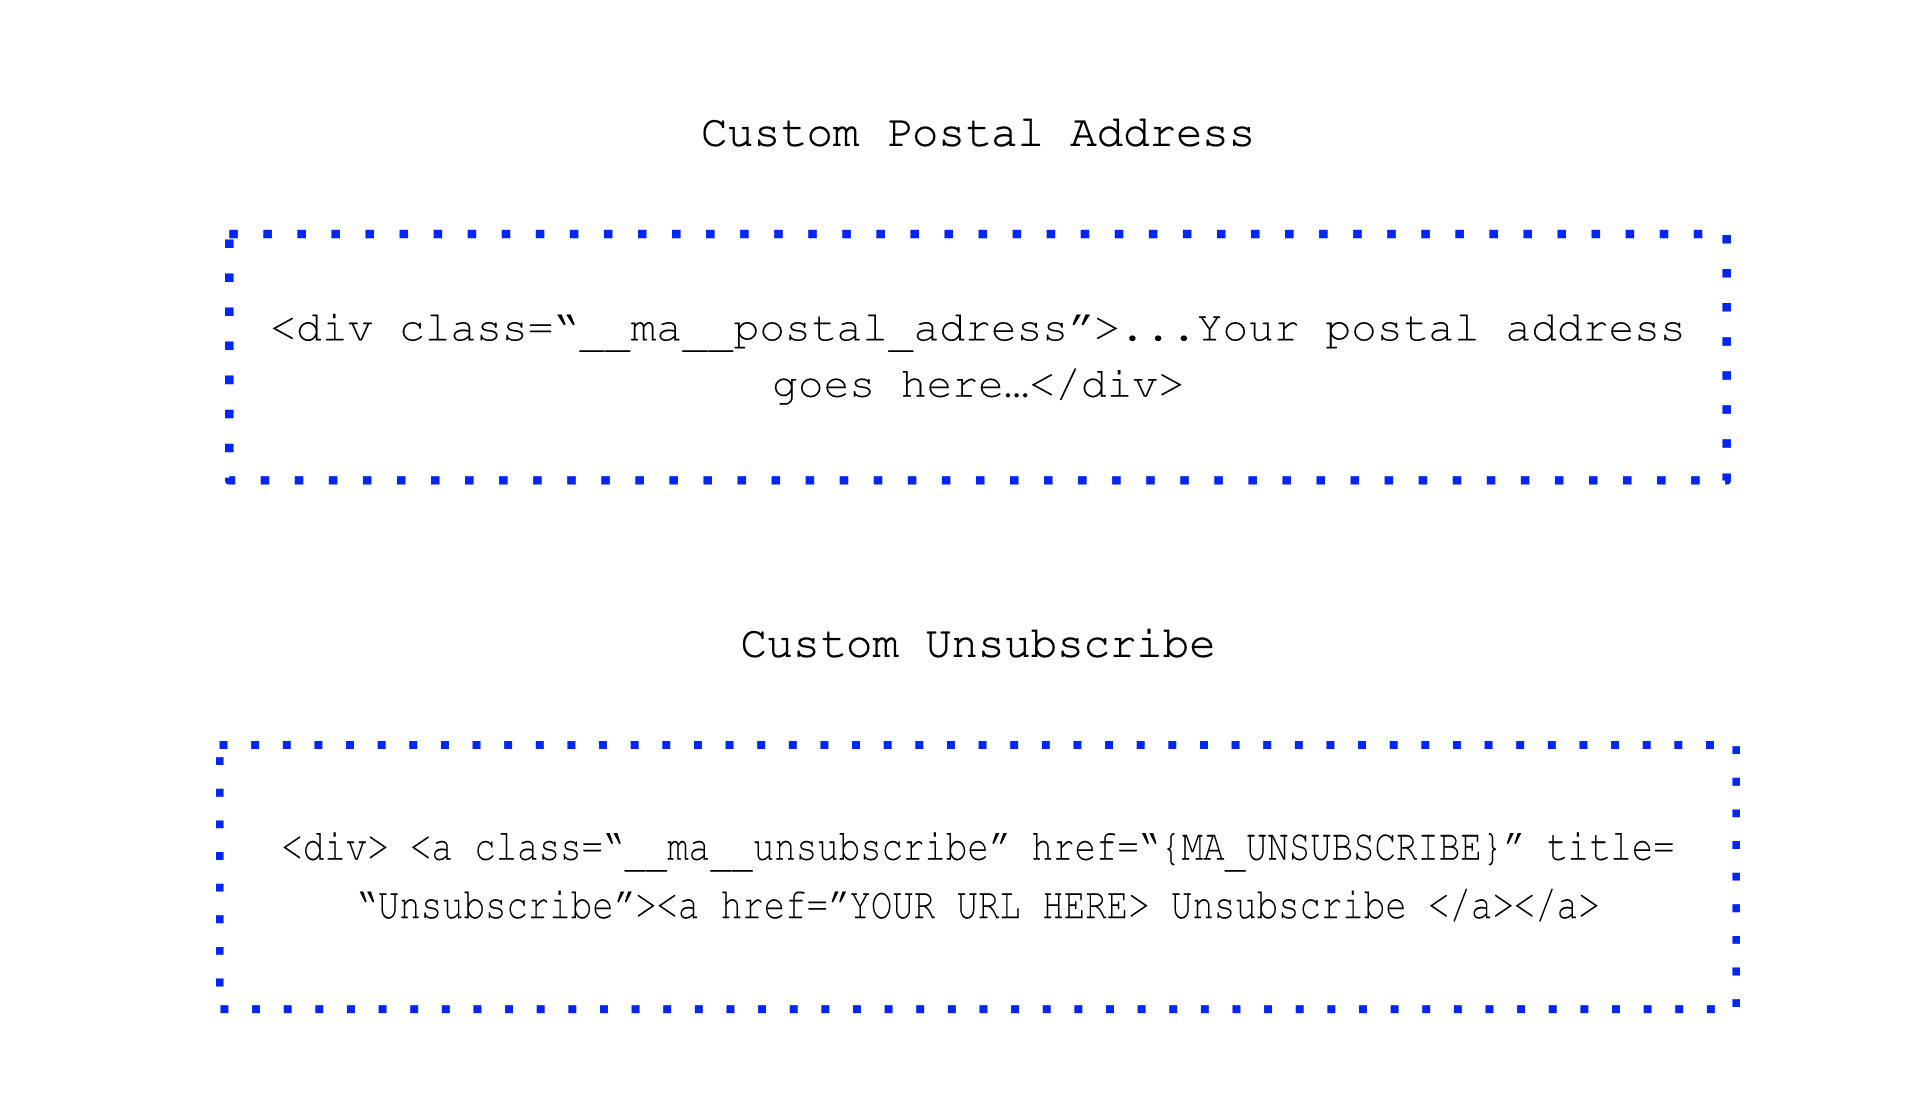
There is also an option to add a Footer block. Adding this block automatically adds your postal address & an unsubscribe link to your footer. Using this option allows for a one-click unsubscribe.
Choosing a Subscription for your email enables Preference Center functionality, and the one-click unsubscribe is no longer used for that email. Whether you use the default unsubscribe verbiage or use the Personalized Fields drop-down to add an Unsubscribe Message, a click of the unsubscribe link will drive them to a system-generated Preference Center page where they can opt-out of any of your Subscriptions or they can choose to globally opt-out.
Previewing Your Emails
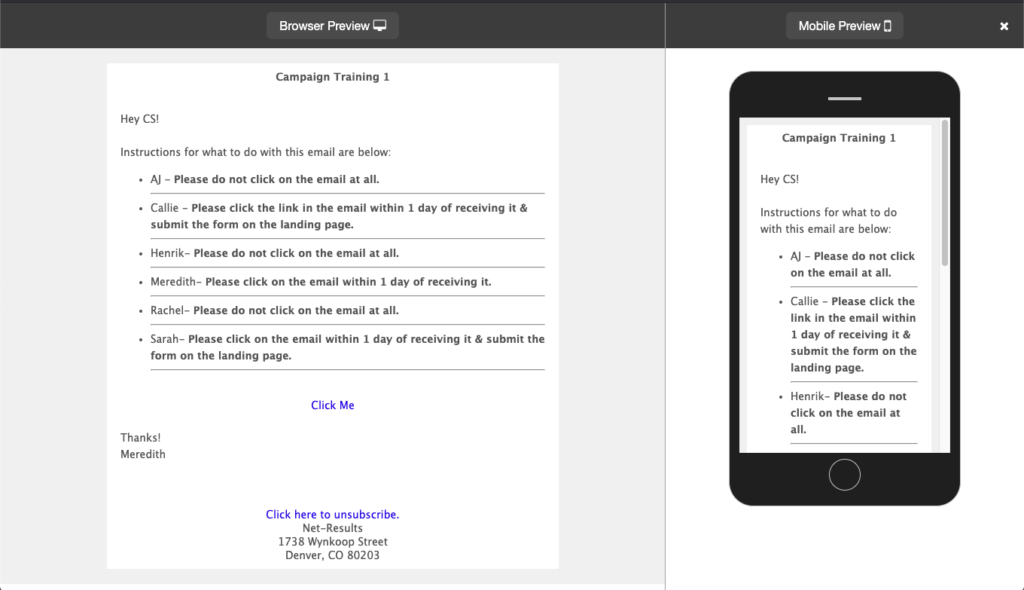
While you are building your email you might want to preview it a few times as you are adding objects such as images, buttons, and text to ensure the objects are rendering correctly in both mobile and browser views.
- When you are ready to preview, you will want to hit the preview button that is on the top-right corner of the screen.

- You’ll be asked if you’d like to “Preview Both” or “Preview Browser”. Below is a screenshot of what it looks like to select “Preview Both”
- When previewing an email, the personalized fields that are used throughout the email will populate with the values that are stored for the user that is currently logged in and previewing the email.
- This means that if your contact within Net-Results does not have values for all personalized fields in the email, you will see the default values that are associated with each personalized field.
Sending a Test Email
Sending a test of your email allows you to see how it will render in specific email clients. It also allows you to test personalized fields in order to make sure that the data is pulling correctly.
- When you have finished building your email, you can select the “Send Test” button that is located in the top-right corner of the screen.

- Once Send Test is selected, a module will appear where you can enter in the email addresses of the persons you would like to receive the test email. If you have filled out your Email Preferences, you will see where the contacts are already prepopulated for you.
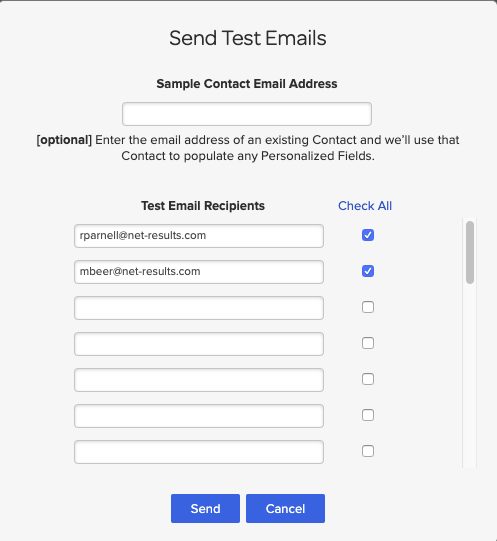
- You probably noticed the “Same Contact Email Address” in the screenshot above at the top of the Send Test module. This Sample Contact allows you to test the personalized fields that you have in your email.
- Simply choose a contact from your database that has a value for the personalized fields that you have added to your email and add their email address there. When the test email sends, you will see the personalized fields populated with the values that are associated with that contact.
Next Check out:
Check out this video to learn more!
