What Is The Image Module?
We make it easy to add images anywhere on your landing page! Simply select the image module, choose from the images you have uploaded to the asset manager & there you have it! Image modules can be placed in any column of a Row on your landing page, and their size will be adjusted to fit.
How to add the Image Module
Add an image to your page by clicking the grey (+) module button. The Settings box will automatically appear. Here you have the option to either enter an image URL or upload an image from your Asset Manager.
[videopress g0mZa6Ss]
Content Options
The content options of your image module consist of 3 sections:
Image
Add your image URL or Upload an image from your Asset Folder
Link
Add a lightbox to your image or link the image to a URL. The lightbox will only display if padding is added under the Design Settings.
URL Open
If you added a link in the above option, always have the link open in a new window so that the client is navigating away from your site. You can have the image work as a button that will link to another page on your site.
Design Options
The design options will allow you to change the appearance of your image module to match the appearance and tone being used on your landing page. You’ll be able to make changes to the following aspects of your module:
Alignment
Set your images to align the left, center or right of your row. You can also choose how your images will appear on a mobile screen.
Sizing
Images will automatically size to the full width of the module. However, their size can be adjusted using the slider.
[videopress Q594gX1h]
Spacing
Here you can choose to add spacing below your pictures automatically or opt to set custom margins (the spacing on the outside of the image) or custom padding (the space directly around the image).
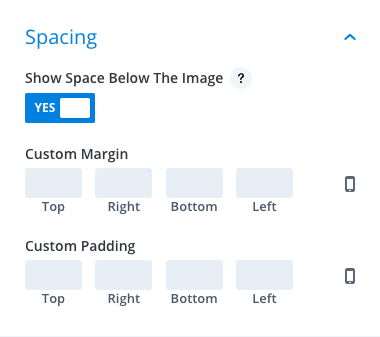
By clicking on the mobile phone next to margin or padding, you can set these options specifically for mobile, desktop or tablet devices.

Border
Here you can choose to set rounded corners on your image, or pick a border style, color and width.
Box Shadow
Select what type of shadow (if any) you would like displayed behind your image.
Filters
Define your color saturation, the contrast of light and dark areas, add a sepia filter or blur your image. Lots of options for filters in this section. Blend Mode allows you to modify how your image blends with any other layers beneath it. Choose “normal” to return to the default option.
Animation
Pick an animation style to enable animations for your image module. Each animation will allow you to customize it further, controlling duration, direction and intensity.
[videopress nPSJrsbR]
Advanced Options
Want to make some changes that may require some additional coding? Look to the advanced tab to make changes to the way your image is being seen by your visitors.
CSS ID and Classes
Add additional CSS Styling by using IDs or classes. These can also be used to create links to particular sections of your page.
Custom CSS
The Advanced tab also allows for you to further design your blurb module by adding custom CSS that you can enter based on the field of depth options available to you (Before, Main Element, and After).
Attributes
Here you can define the HTML ALT text for your image using a short description. This section can also be beneficial for leveraging SEO Content.
Visibility
This option allows you to control which devices can view your image. You can decide to disable the visibility for phones, tablets, and browser windows by checking the box next to the devices you’d like to exclude.